Are you having trouble seeing enemies in Cold War? You’re not alone. We put together a bunch of settings to improve the visuals in the new Call of Duty drastically. There are many darker maps in this game, such as Miami, and spotting enemies can be challenging. When you finally notice someone, it’s likely too late. Here are the best visibility settings in Black Ops Cold War.
Changing these settings and optimizing them for your monitor and setup will likely improve your ability to see enemies. Poor visibility is one of the main complaints players make when playing this game. These settings work on all systems, including PC, Xbox, and PlayStation. So if you want to know how to stop enemies easier in Black Ops Cold War, read on.
Best visibility settings in Black Ops Cold War
Here are the settings you can adjust to increase visibility in Black Ops Cold War:
- Brightness
- Colorblind Mode
- Digital Vibrance
Brightness
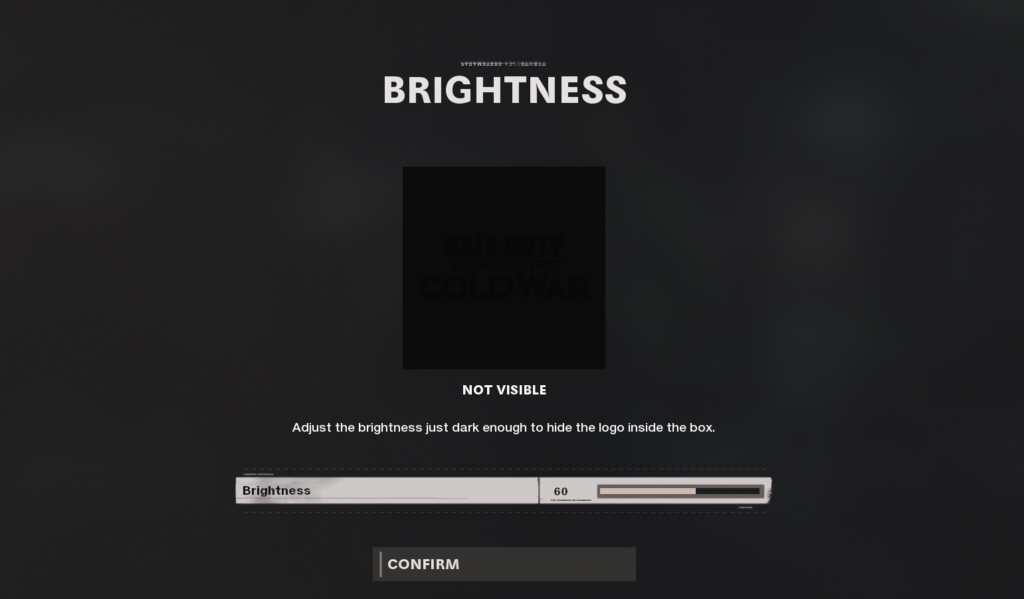
The first two settings we’re looking at are in Black Ops Cold War through the game menu. These are available on all consoles and PC, so head into the options and go into the graphics settings. Scroll down to the display section and select the Brightness option.
Change this setting so that you can see the Black Ops Cold War logo in the background. Adjusting this setting correctly depends on things like your monitor’s brightness. We recommend changing the slider so that you can see the logo, but not too bright. Personal preference also comes into play, as some players may want to crank this up to the maximum. Somewhere around 75% seems to be the right spot for visibility.
Colorblind Type Mode
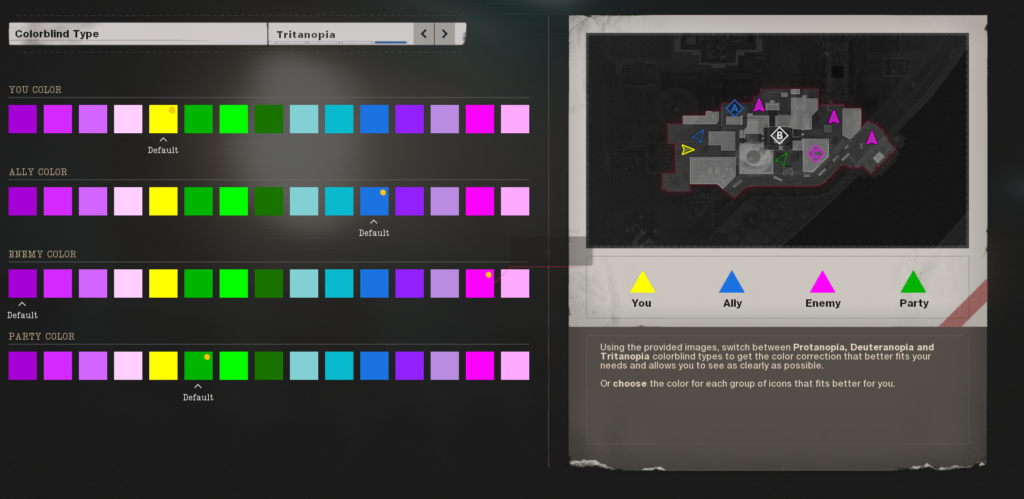
The next option is also in the settings, and it’s called Colorblind Mode. You can find this in the Display section of the graphics settings, above the brightness option you just adjusted. This setting primarily affects enemy markers.
Change the Colorblind Type to Tritanopia to get some more visibility on enemy markers. By default, the enemy marker shows up as a dull red color, which can be hard to spot in certain situations. Changing this setting makes it pop a lot more by changing it to bright pink, allowing you to spot people more easily.
Digital Vibrance
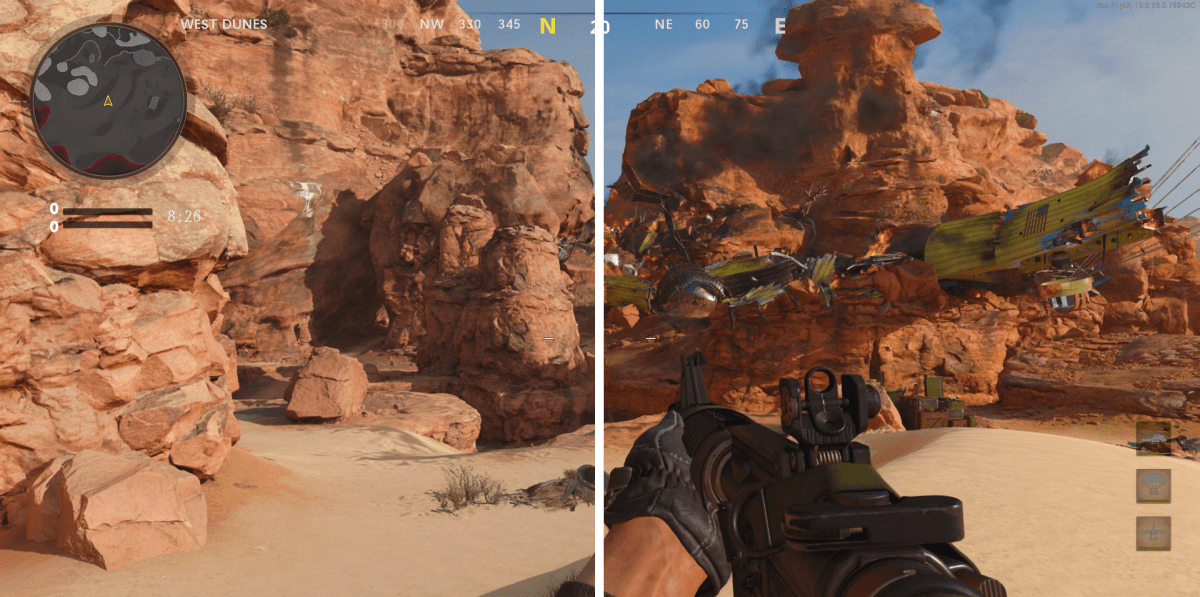
The most important setting is digital vibrance, and this is easy to change with an NVIDIA GeForce graphics card. Unfortunately, this option is likely only available for PC users. Console users can do an alternative method of changing some monitor settings to try and mimic this.
While in-game, you can hit ALT+Z to pull up your GeForce Experience overlay. If it’s not working, make sure your drivers are entirely up to date, and you have GeForce Experience installed and in-game overlays enabled. On the top left, you should see an option for Game Filters. Select a style to begin adding some filters.
Click on Add Filter, and add the Sharpen filter and increase it to 55 to 60%. Next, add the Color filter and decrease Tint Color and Intensity to 0. Most importantly, change Vibrance to 100%. The Vibrance setting is what will make the most difference.
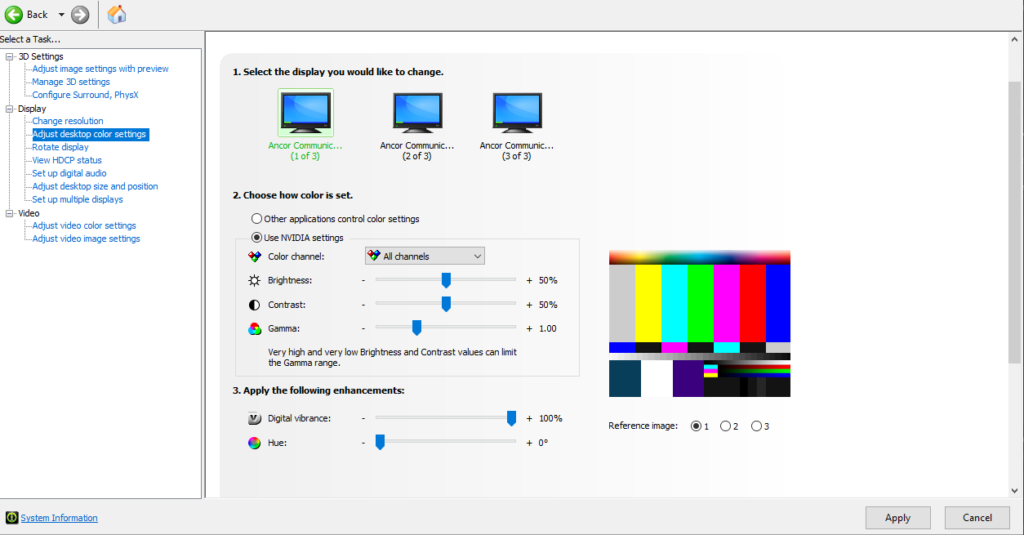
Another way of doing this is by going into the NVIDIA Control Panel, and going into Adjust desktop color settings. Under the enhancements section, you can turn up your Digital Vibrance to 100% for the corresponding monitor.








Published: Nov 19, 2020 07:46 pm