
One of the main draws of the mid-season update, or Season 3.5, is some changes to Outbreak. The popular Call of Duty zombies mode was the subject of a few changes, and there’s now a more in-depth Easter Egg and main quest available for players to challenge. It’s an elaborate and challenging task, so you may want to follow along with our guide on how to complete the Black Ops Cold War Zombies Outbreak Easter Egg for Season 3.5.
The Easter Egg entails a lot of running around, gathering items, and completing small objectives. As long as you know where to look, that part is not too difficult. There are a lot of steps you’ll need to complete in a specific order. The final boss is not easy, so come prepared. If you are solo, we recommend using Aether Shroud to make a couple of parts more manageable, which we’ll detail below. For teams, split your perks evenly between Frenzied Guard and Ring of Fire for optimal boss damage.
How to complete the Black Ops Cold War Outbreak Season 3.5 Easter Egg
To complete the Black Ops Cold War Zombies Outbreak Season 3.5 Easter Egg, you’ll need to:
- Get to round three and find the Unknown Signal.
- Tune all three signal amplifiers to the proper frequencies and interact with the Unknown Signal.
- Go to the beacon and respond to Maxis and then warp to the next map.
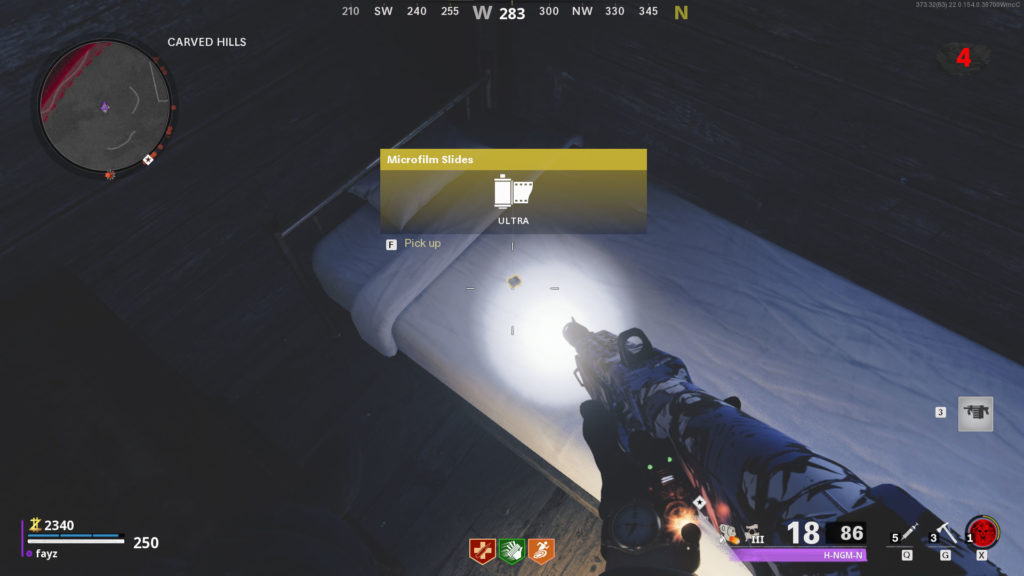
- Find and shoot the four hidden Monkeys and obtain the Microfilm Slides.
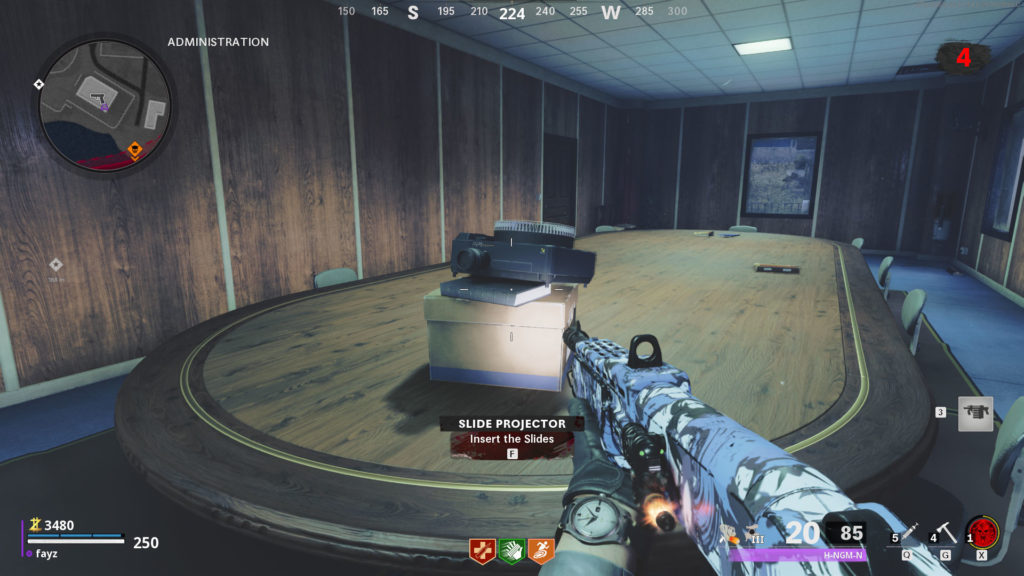
- Put the slides into the Projector and then head to the Beacon to go to Ruka.
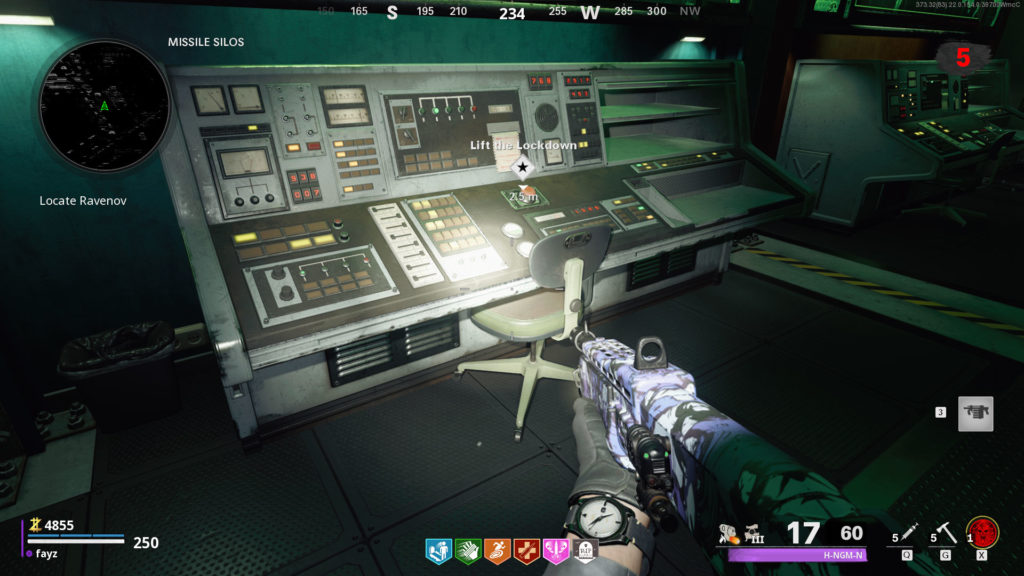
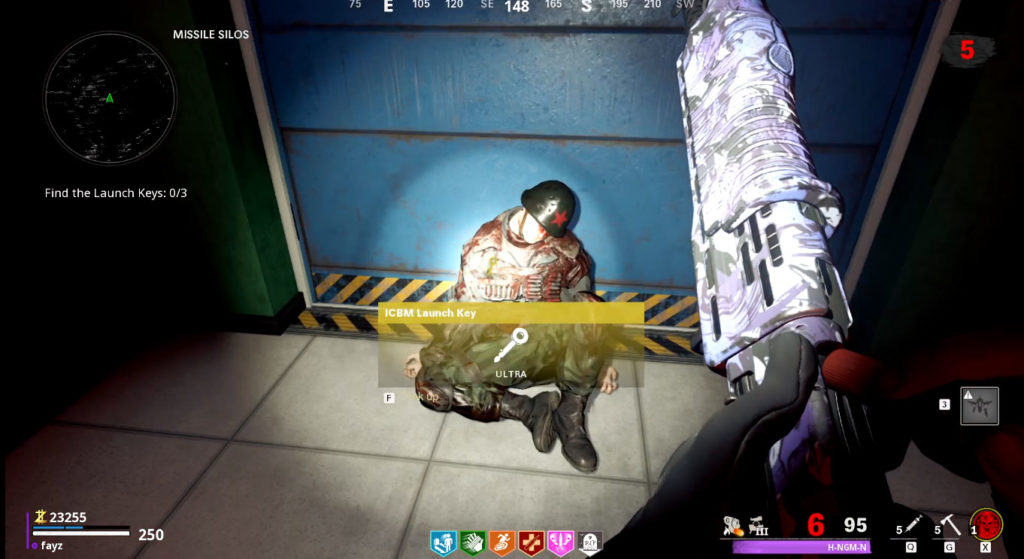
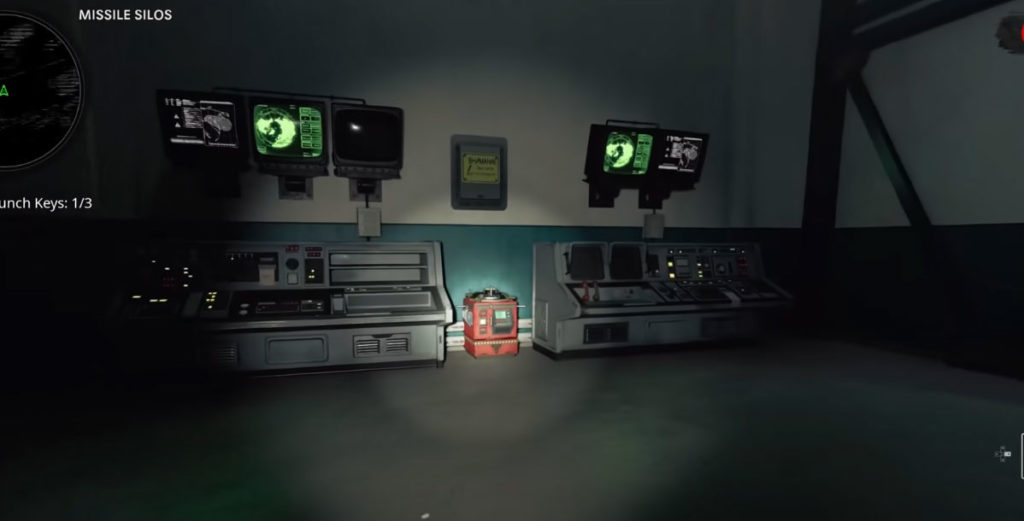
- Head down into the bunker, lift the lockdown, and find the three launch keys.
- Activate the terminals and defeat the final boss within nine minutes.
You can find all five maps below, with clearly labeled locations for every item you’ll need to find. Feel free to reference this at any time, as it will help you out as you’re completing the Easter Egg.
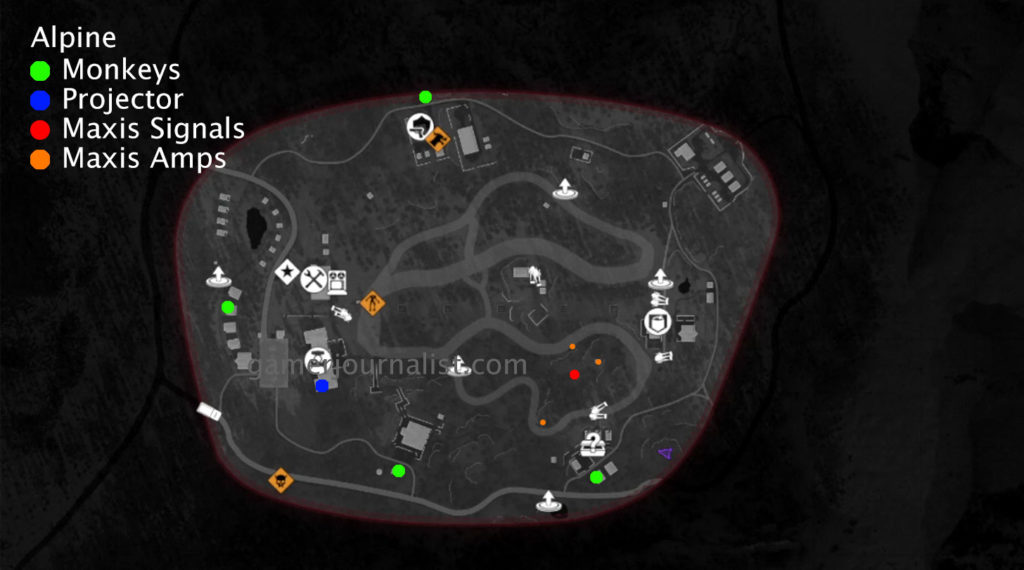
- Alpine Easter Egg Locations Map
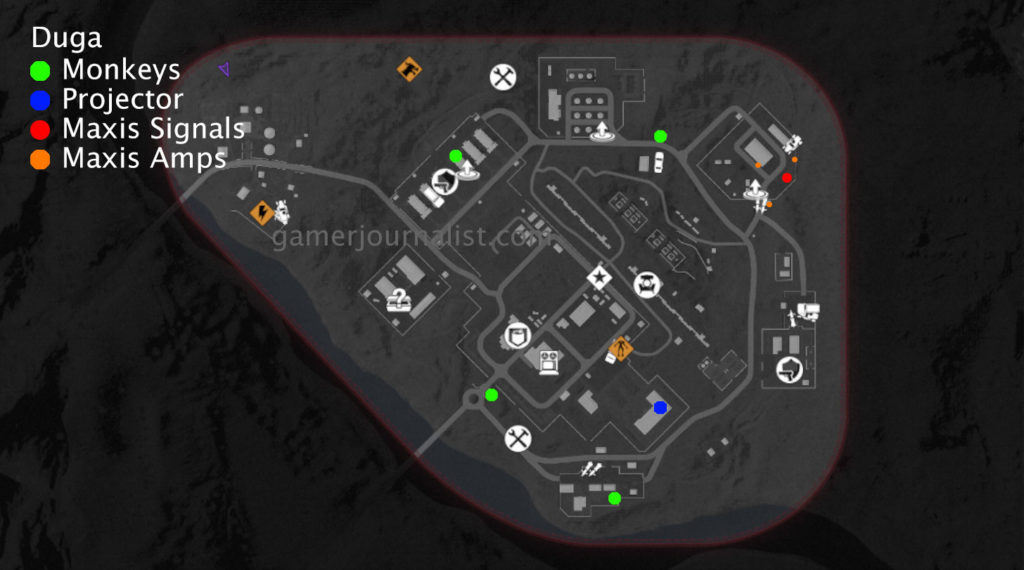
- Duga Easter Egg Locations Map
- Golova Easter Egg Locations Map
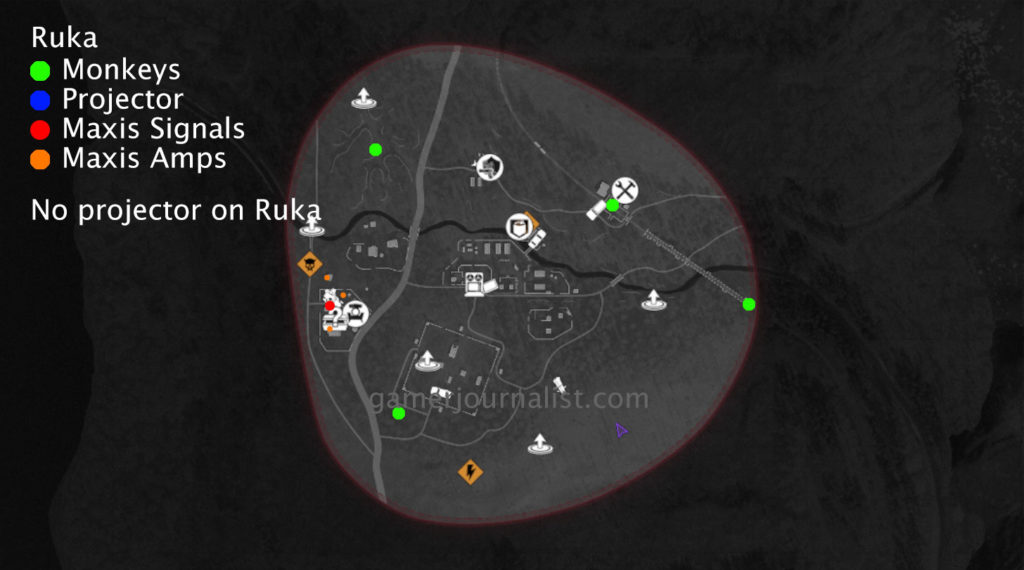
- Ruka Easter Egg Locations Map
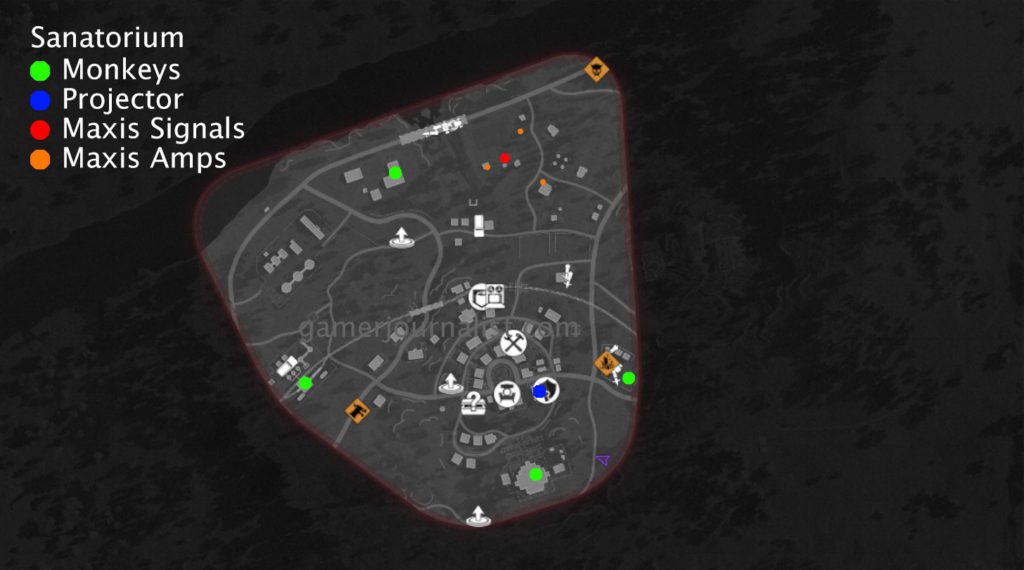
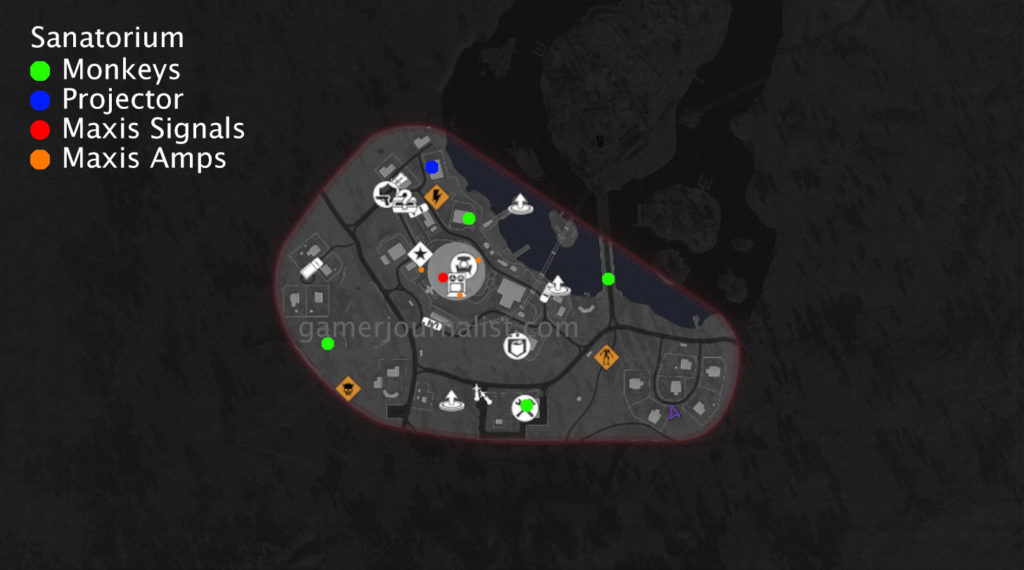
- Sanatorium Easter Egg Locations Map
Unknown Signal and Signal Amplifiers
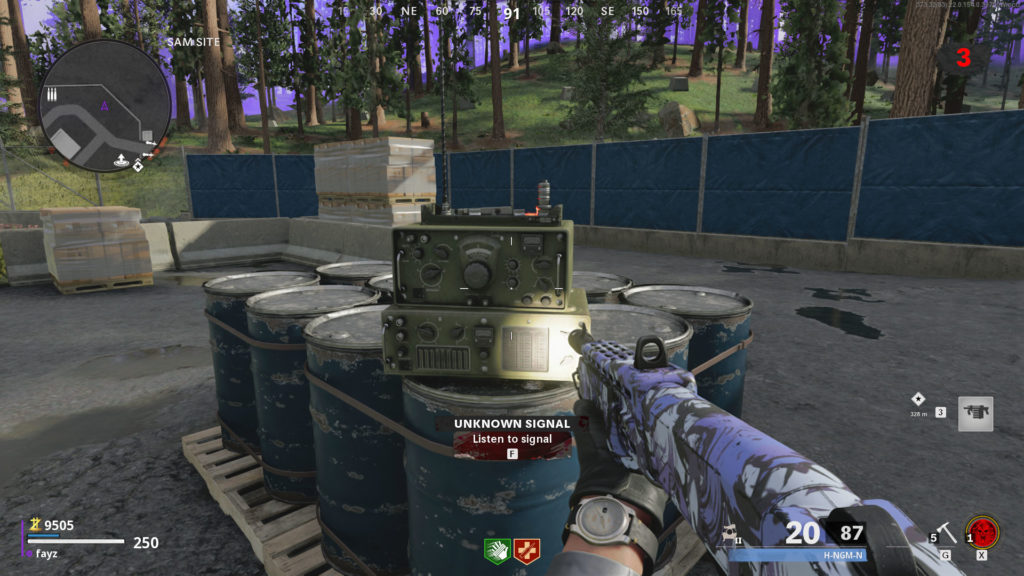
First, you’ll want to progress until you get to round three, and then you can begin by finding the Unknown Signal. The location depends on which map you’re on, so refer to the maps we made. Interact with the radio, and take out the horde of zombies that spawns. It’s nothing too serious.
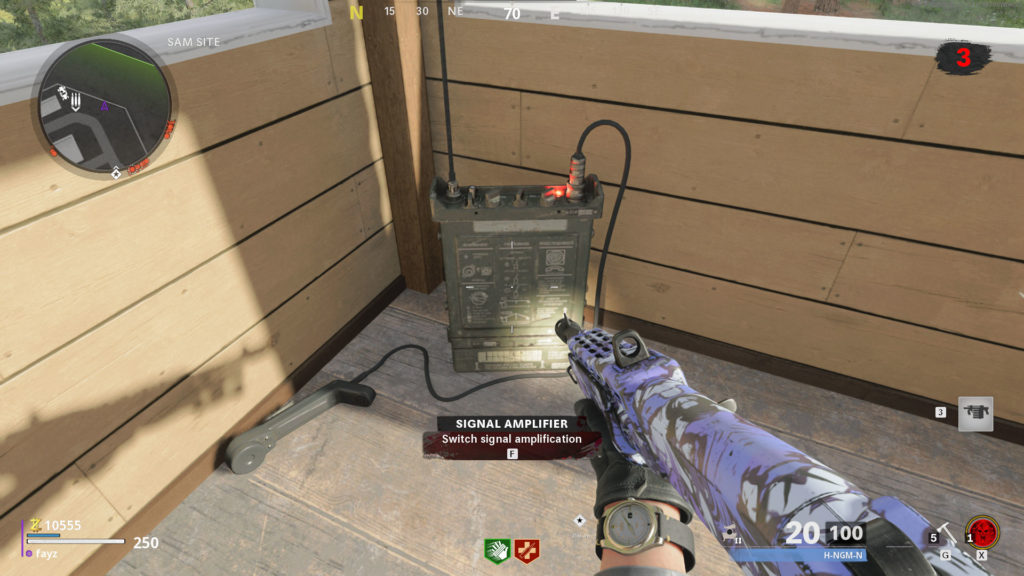
Next, you’ll find three signal amplifiers nearby, which are all set on different frequencies. You’ll want to adjust the signals until you can hear Maxis’ voice. If the light turns red, which it probably will, you will have to first take out the hordes of zombies that spawn nearby. After they are dead, you can mess with the frequencies. Do this for all three signal amplifiers until you can finally interact with the Unknown Signal again.
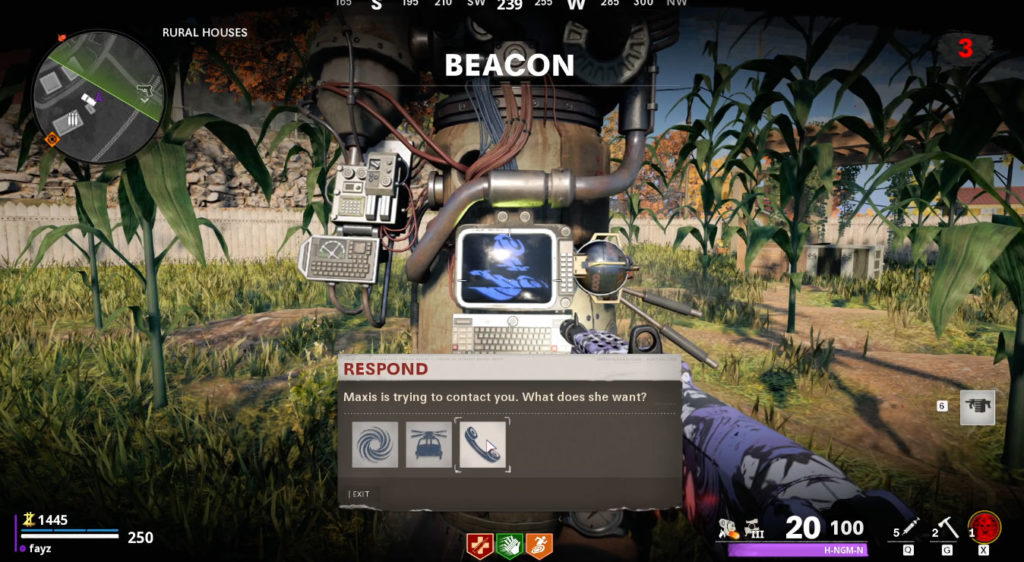
Next, head to the Beacon like you normally would to complete the round. You should see an option to respond to Maxis, who has been trying to contact you through the radio from the previous steps. Respond to her, and then warp to the next area.
Monkeys and Microfilm Slides
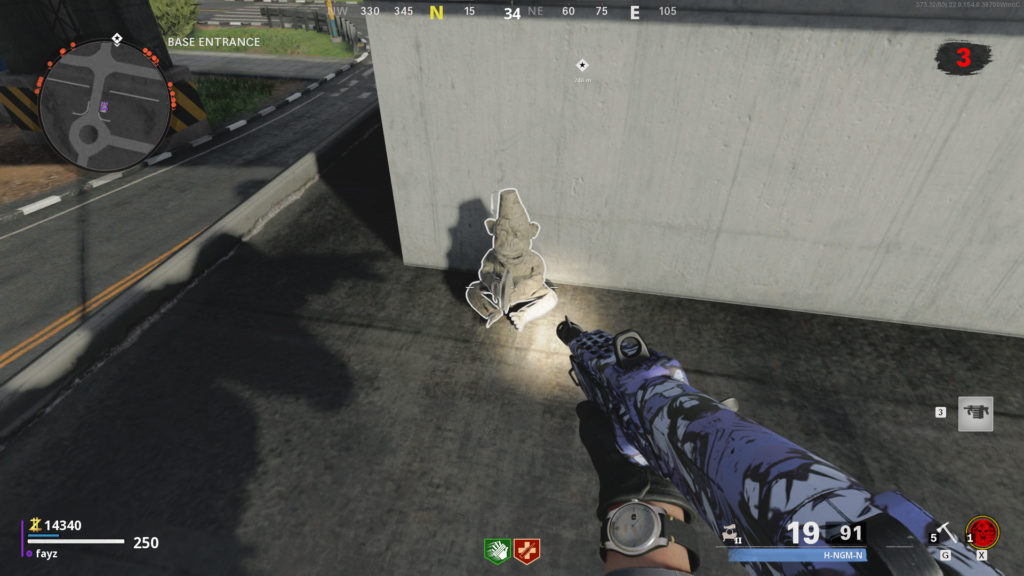
Now it’s time to destroy some small Monkey statues or bombs that are hidden throughout the map. Again, these are labelled clearly on the maps below. There are four of them, and you’ll need to destroy all four.
You should get a Microfilm slide from the final monkey. However, in some cases you might not get one if it’s your first attempt at doing this Easter Egg. If that’s the case, warp to the next map and try again. In my case, I managed to get one on my first Monkey after warping to the next map.
Finally, take the Microfilm Slides to the projector on the map. There is a projector on every map, except for Ruka. If you got unlucky and you’re stuck on Ruka, sorry, but you’ll have to warp yet again to the next map. When you find the projector, interact with it to put in the slides. Advance through the slideshow by interacting with the projector again, until the sequence is over.
Finally, you can warp to the next zone by heading to the Beacon, which will always be Ruka if you viewed the slides. Now, it’s time for the difficult part and the start of the “Operatsiya Inversiya” objective.
Launch Keys and Terminals
Follow the marker down into the bunker, and proceed to lift the lockdown. The computer terminal is on the bottom floor of Silo A-2. Interact with the terminal to lift the lockdown, and get ready for some action. As a side note, the place is kind of confusing, but just know there are three main silos: A, B, and D. You cannot access C, but there is a tunnel labeled with a C.
As for the launch keys, here are their locations:
Launch Key 1
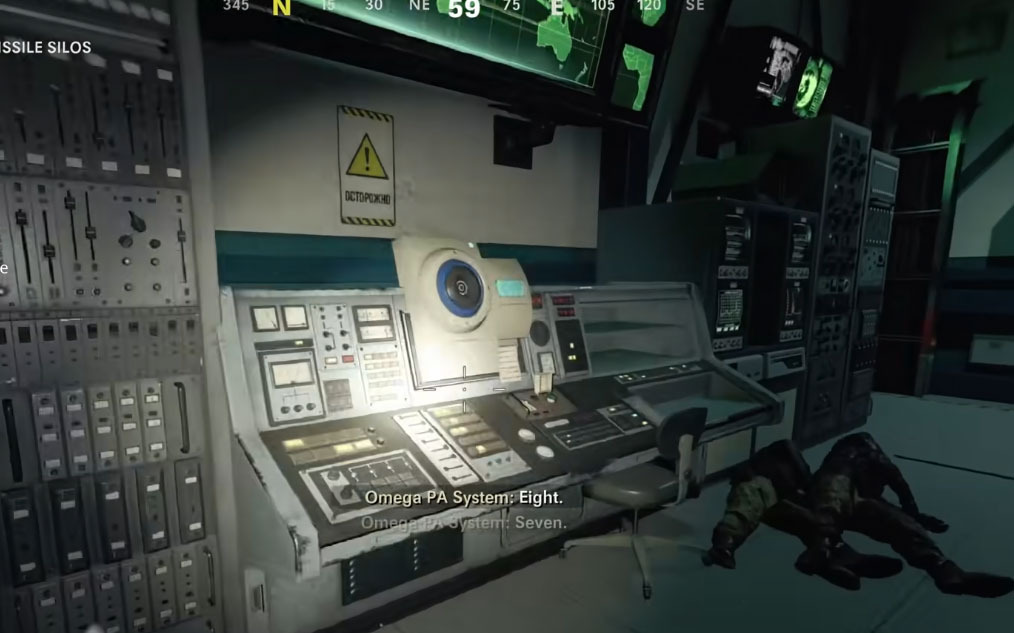
At the end of tunnel C, interact with the dead body. A deadly Red Mimic will spawn, and you need to take it out as fast as possible. Many more Mimics will also spawn, but as long as the big red one dies, they disappear. The Red Mimic will drop the launch key.
Launch Key 2
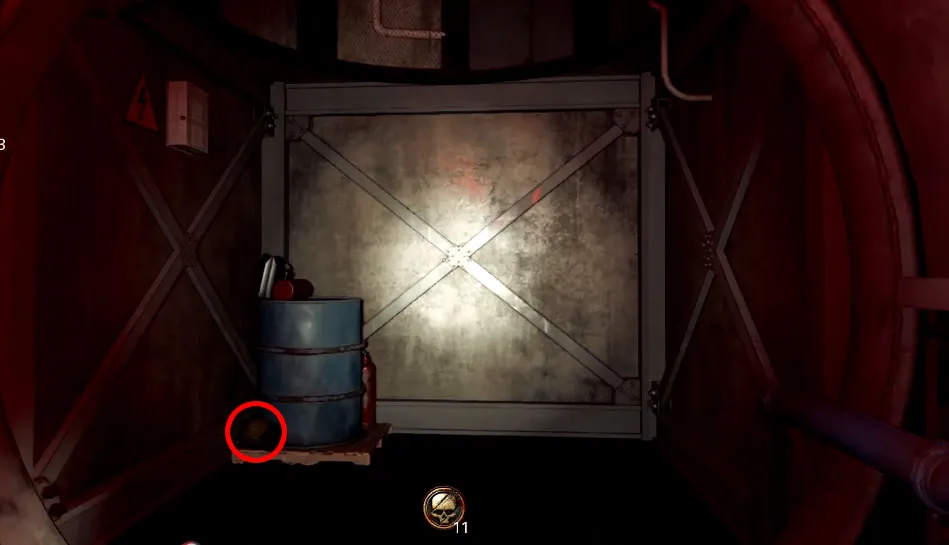
Go to the bottom of Silo A, and look for the red tunnel. There’s a small essence trap next to the blue barrel. Pick it up, and look for the blue monkey that comes out of the vents in the Silo A area. Do not get too close to the monkey, and then throw your essence trap near it. Doing this lures out the monkey. Activate the essence trap with your use key to trap the monkey when it’s on top of the essence trap, and get the launch key.

Launch Key 3
Go to the bottom of Silo B, and find the red Aetherium Harvester device. Activate it, and then run around inside Silo B destroying the purple crystals. They drop smaller crystals that you will need to deposit into the harvester. You need to deposit twenty crystals total. After it’s filled, pick up the canister after the animation, and take it to Silo D. Use the canister on the giant glowing purple jellyfish to blast it into oblivion. The ICBM Launch Key is inside the jellyfish, which you should get drawn into if you’re standing on the grass when you blast it.
Launch Sequence
Finally, it’s time for the launch sequence. You can do this however you like, but doing Silo A, then D, then B is straightforward. Basically, you are looking for a similar-looking terminal in each of the silos. After activating the first one, you have 45 seconds to get to the next one. After you activate all three, a nine-minute timer starts for the boss fight.
How to fight Legion (Boss Fight) in Outbreak
From the main terminal area that’s between all the silos, go up the stairs and open up the door. Time is important here, so do it quickly. But first, here’s how the boss works. You will likely want your team to use Frenzied Guard and Ring of Fire for this one. Using Monkeys for distractions makes this a lot more manageable as well. The boss has armor, and when the armor breaks, it spawns orbs around it, which you must destroy to take off its health.
When you spawn into the Legion fight, unleash on it to try and destroy its armor. Zombies will spawn shortly after, at which point one of the players needs to take care of them. You should always try and focus on destroying the boss’s armor. When the armor is cracked, the boss will kneel down. When that happens, your entire team needs to focus on one of the orbs. There are three Orbs, and destroying an orb takes away a third of Legion’s health. One player with Frenzied Guard will make it so everyone can focus on eliminating the orbs.
As long as you have good weapons and gear, you should be able to withstand the onslaught and take down Legion. It is by no means an easy fight. The M16 with Brain Rot is a solid option, but if you’re solo, try Shatter Blast on your Tac Rifle to crack the armor. Good luck!
Alpine Easter Egg Locations Map
Duga Easter Egg Locations Map
Golova Easter Egg Locations Map
Ruka Easter Egg Locations Map
Sanatorium Easter Egg Locations Map


Published: May 25, 2021 04:46 am