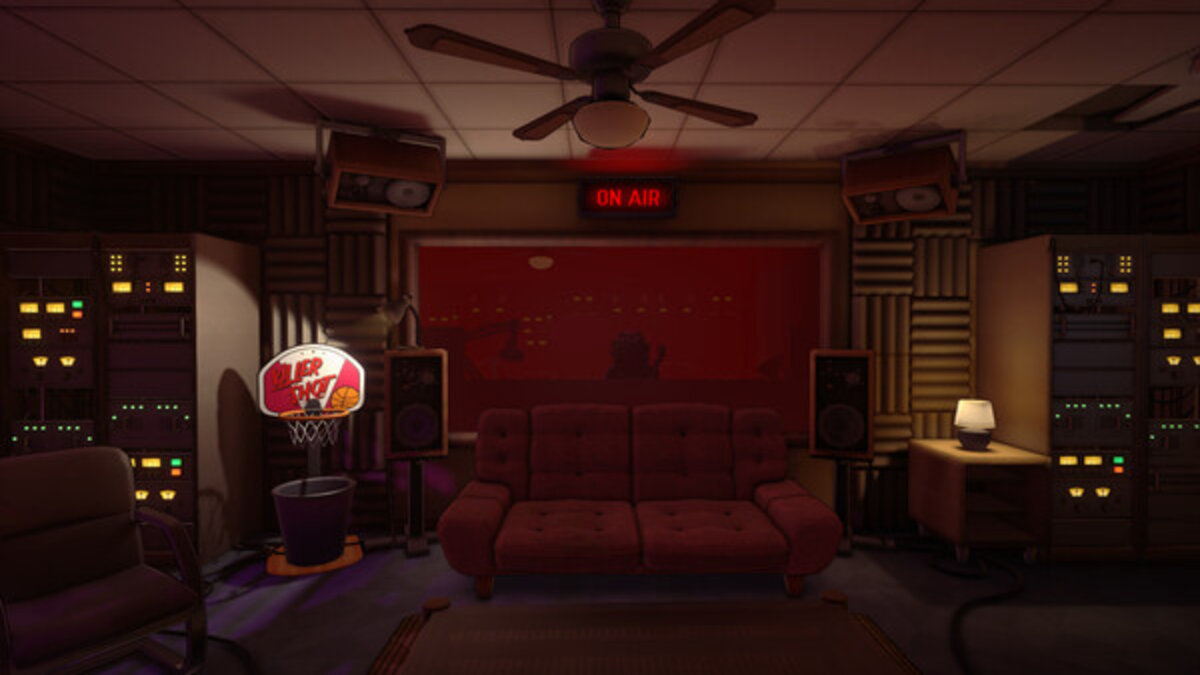
Killer Frequency is a great Indie Horror Game that perfectly mixes quirky, fun comedic moments with intense moments of panic as you act as a 911 Operator to try and save the lives of those under threat against the Whistling Man. With every caller being a possible victim and new puzzles and problems to solve as those on the other line wait for your call to save their lives, the pressure to rescue everyone you come to meet in Gallows Creek can be suffocating. With breaks in between each dire moment, you will need to keep your wits about you, retain all useful information and explore the Radio Station to come up with possible solutions to deadly problems. This is Vincent’s guide on how to get the best possible ending by saving everyone in Killer Frequency.
How to Save All Whistling Man Victims in Killer Frequency
Killer Frequency hits players with multiple scenarios that you will need to face in order to protect and save each Caller. From giving out wrong information to the killer, to figuring out the route to safely exit an intricate labyrinth. There are many ways to mess up, alongside 23 possible victims to save. There is nothing that can be done however for Sheriff Matthews and Jimmy, as their deaths are canon to the storyline. Everyone else you speak to (aside from the killer), can be saved based on the actions you take and the dialogue choices you make.
Leslie and Martinez
Killer Frequency goes straight into the action once the first victim calls into The Scream Radio Show. Forrest and Peggy need to work together with Leslie, an Officer, to help Deputy Martinez as she knocked out and locked up in a cell with the key trapped inside. After learning that Sheriff Matthews is dead, it is down to Forrest (you) to figure out the best moves for the possible victims of the Whistling Man to make. One wrong step and it will be curtains for the small population of Gallows Creek. To save Leslie and Martinez, follow this step-by-step guide below.
- ‘Find another set of keys‘ to free Martinez from the cell.
- ‘Check Sheriff Matthews‘ for the keys.
- ‘That’s the right thing to do‘ for Leslie moving Martinez into her car.
- ‘Lock the doors‘ quick-time prompt.
- ‘Take a Police Cruiser‘
- Both guns are emptied so it does not matter which you pick here. Martinez does not have a gun on her and Matthew emptied his clip when he was attacked. Choose ‘Is there a weapons lockup?‘, she will check Martinez’s belt for a weapon.
- Take ‘Taser‘.
- Do you hear that? Choose ‘No‘.
- ‘Be careful‘.
- Be sure to tell Leslie ‘Try not to crash‘ when she is signing off after escaping from the Whistling Man by tasering him.
Sandra
Sandra is the next victim who needs to learn how to hotwire a car in order to escape the Whistling Man. The guide to saving here is as follows:
- ‘Sheriff Matthew is dead‘.
- ‘Is there anywhere else you can go?’
You need to locate the Timberline Twins Talk Motors Manual, it is located inside the men’s toilets, in the left cubicle. You need to tell Sandra to follow the correct steps to hotwire a car in this order:
- ‘Put the screwdriver in the ignition and twist clockwise.’
- ‘Unscrew the steering column‘.
- ‘What’s the serial number?’
- ‘Strip and twist the Red and Yellow wires together‘.
- ‘Strip the Purple wire and brush against the twisted wires‘
Maurice
Maurice is one of the hardest victims to save in Killer Frequency. Being trapped in Office, he needs your help luring the Whistling Man away from him so that he can escape. But with the staircase blocked, you need to find a way to trap the Whistling Man so that he does not get Maurice. You will get a fax sent to you, the machine can be found in the Office space at the end of the hall, in front of the first cubicles. Here you will get a map of the layout where you need to pay attention to both Maurice and the Whistling Man’s position.
- ‘Call the Editors Room (03)’.
- Move Maurice to ‘Kitchen‘.
- ‘Use a radio?’
- ‘Must be a The Scream fan‘
- ‘Maurice, turn the volume down‘.
- Send Whistling Man to ‘Boardroom (04)’.
- Use any option to lure Whistling Man in – impersonation, advice or calling him a jackass.
- Tell Maurice to ‘Hide in cabinet‘.
- Turn down Speaker dial on soundboard just in case you make a noise.
- When the quick-time prompts come up, do not select anything!
- Peggy will clear you to talk.
Virginia
Dr. Virginia Sullivan is the next soul you have to save. The task at hand is trying to locate Virginia by finding the frat party through the takeaway they had ordered from. But without knowing anything aside from the fact that the lawn is covered in beers, your job is to call the correct takeaway and order food to the frat. To make it worse, all takeaways had ordered to a frat in Gallows Creek, meaning any guesses you make will lead you down what you think is the correct path until poor Virginia is killed. Your options are Grilling Spree, Chalupacabras and Ponty’s Pizza.
Firstly, grab the Staff Room Keys on the welcome mat outside of the door located after turning right from the toilets and next to the spilt liquid with a bucket and mop on top. Go downstairs, behind the Receptionist Desk and open the Staff Room here. You can find the Pizza Box inside the bin in the Cafeteria space (cup icon by door). You can get the information about Chalupacabras inside the Office space, on top of the first cubicle desk (opposite the fax machine). Finally, learn about Grilling Spree by finding the cassette (cream with green color), located on the second Office cubicle aisle. With all of this information, you can decode which offers beer that the frat will have chosen to order from.
- ‘Call Ponty’s Pizza‘.
- ‘Hey dude.’
- ‘Garlic Bread.’
- Play ‘The Flow’ (third record in your collection).
Eugene
Eugene is waiting for the love of his life to arrive, but unfortunately she will not be showing up tonight, instead the Whistling Man is. Being stuck at the centre of a Maze, your job is to safely get Eugene out. The Maze can be found at the Receptionist Desk, placed inside the bin. Out of fear, Eugene ran, meaning he is no longer is the centre of the Maze. With his starting position being in front of a tractor, you note that he is located at ‘1’ on the Maze Map. From here, tell Eugene to head in these directions, in the exact order listed below.
- ‘Go left‘.
- He will end up at 3 with the Pig Statue. Tell him to ‘Go backwards‘.
- He will get close to 5, the Pitchfork Statue. Tell him to ‘Go left‘.
- In between the Mini Barn and Scarecrow, send Eugene ‘Right‘.
- He will end up at the Corn Silo (9), say ‘Go right‘ for him to escape.
Murphy
Your first call with Murphy did not go particular well, what with him inviting the Whistling Man to come meet him for a one on one battle. If you let it go his way, his martial arts will not do much to save a man who supposedly died in the 50s. The Whistling Man placed Murphy in a dumpster and locking him inside. With the Fire Department unable to assist, your only options are Peggy’s friends who you need to determine who lives closest to the Waste Disposal Plant to rescue Murphy from a terrible fate. Your options are: Alex on Haddonfield and Romero St, Katherine on Myers Lane (West) and Jericho on Myers Lane (East). Whilst the obvious pick may be Jericho due to living the closest to the Plant, his age is a factor in his ability to rescue Murphy.
Not only this but there are street closures of Macready St (East) who anyone passing through would need to go between Rogers Avenue and Haddonfield Road. The person to call to save Murphy is Katherine.
- ‘Murphy can you see anything?’
- ‘Katherine go to recycling‘.
- ‘Do you hear anything Murphy?’
- ‘Katherine go to the crusher‘.
- ‘Henderson Disposal‘.
Carrie
Carrie is next on the list of victims for the Whistling Man. Having murdered a few of her friends which unfortunately you can do nothing about, Carrie tries to hide from the killer. Having placed herself inside the Murder House (Puppet Combo anyone?), she hears the Whistling Man approaching. She lists all areas as part of the House that are options to hide in – Bathroom, Bedrooms and a Closet.
- ‘Where are you?’
- ‘Go to the Bathroom‘.
- In the quick-time prompt select ‘Don’t move‘.
- ‘Go home Jimmy‘
- Choose ‘Run‘ in quick-time prompt.
- ‘I’m sorry about Jimmy‘.
Go find Jeanie’s desk downstairs, behind the couch. You will find a Friendship Quiz which will give you a little insight to Jeanie and Carrie’s friends. This will allow you to choose who does what task for their escape plan.
- Between Heather, Kyle and Hot David, choose ‘Heather‘
- For Seth, Jennifer or Scott, choose ‘Jennifer‘
- ‘This plan is impressive‘.
- For a runner we have Hot David, Cynthia and Scott, choose ‘Hot David‘.
- Between Lisa, Tammy and Cynthia, choose ‘Lisa‘.
- Finally, between Chad, Scott and Cythia, choose ‘Chad‘.
- Tell Carrie to ‘Focus‘ when she is grabbing the keys.
Getting Dawn’s Long Ride Home Record to Save Chuck
Whilst you are not in theory saving Dawn from the killer, she holds valuable information on who may be next of his list. Because of this, Forrest must pucker up the courage to go outside and pick up the vinyl that Peggy previously threw out of the Studio. In this instance, say that you will complete the task for Dawn. Get the fire door key off Peggy and go into the alley to collect the record at the end of the path. After heading back you will see that the fire door has shut and locked behind you. There is a cellar door but it requires a fuse to unlock. The fuse can be found by going right by facing away from the door and to the end of the path, before heading around the corner. The fuse is on top of the wooden crate.
After picking up the crate, go backwards past the fire door. Head all the way around where you will find a Breaker. Place the first fuse down here. From the Breaker, go back to the crossroads you can from and go left this time where the second fuse can be found on the couch. The third fuse is found inside the tipped over trash can opposite the fire door. Similar to the fuse puzzle in Stay Out of the House, you need to place in the fuses to equal a voltage of 70. The fuses must have the numbers – 15, 5, 20 and 30 on them. Flip the switch with all fuses in and return to the cellar door to go inside.
Head into the Janitors Closet to find a mysterious secret room where the Basement Keys can be found on the desk. Return to the Studio to continue the game and fulfil Dawn’s request.
The next victim on the list is Chuck Brody, deciphered by the bulletin board info offered up by Clive the Janitor. You need to select the Gas Station as the location of Chuck where the Whistling Man is likely targeting next. Because of the information you found, you were able to save Chuck and others with a narrow escape inside the Gas Station.
Solving Puzzles in Clive’s Room
Return to the Janitor Closet to find the Basement Key on the wall. Head into the Basement Storage via the door on the left at the corridor where you would normally go right to go back to the Receptionist Desk. A tape and a polaroid photo can be found on the desk on the left that you should listen to. There is a lot of secrets to find in the Basement so be sure to check everywhere to learn all about Clive. Use the polaroid photos to find the next clue about Clive. If you find all of the correct information (Autopsy and Toxicology Reports) it should lead you back to Virginia and Sandra, two prior victims.
Virginia’s phone call:
- ‘Clive‘
- ‘Why are you so certain?’
- ‘It’s okay‘
Sandra’s phone call:
- ‘Why were you targeted?’
- ‘You found the body‘
- ‘Sure‘
- ‘Of course‘
Rink
The next event begins with mysterious Dawn who is claiming that the Whistling Man is on the way and that she must break into a house to be safe. You need to locate the Starling 2000 Manual which can be found in the Basement Storage Area, past the shelving units and on top of a cabinet. On your phone call with Dawn, you need to give her the ‘alarm test activation code’ to stop her from getting inside.
Jason
The final person you must save is Jason, who requires an ambulance after being attacked by a group of masked people. You need to find out as much relevant information you can about Jason to help him. Upon calling the Nurse at St. Gabriel Hospital you are given a ton of information to remember about providing first aid to Jason. These are the dialogue choices you should make:
- Should Casey pull out the knife? ‘Don’t touch the knife‘
- ‘We need to secure the knife‘.
- ‘Use the cleaning rags‘.
- ‘Ok‘.
- ‘Could someone nearby help?’
Grab Reggie’s Key from Peggy’s door and head downstairs and out back into the Staff Only Area. Turn right and go into the first Office in front of you. The 4 digit code you need is 1107. After reviewing all of the floppy disks you need to tell Peggy to call John Hedges.
- ‘He’s going into shock.’
- ‘Elevate Jason’s legs‘
- ‘Apply additional bandages‘
- When Peggy asks who to call, select ‘John Hedges‘.
- ‘This is a medical emergency‘
Peggy and Teddy
The final thing to do in Killer Frequency is distract ‘Dawn’ (The Whistling Man) for long enough so that the cops can move in and apprehend her. You need to head down to the Basement to turn the power back on as a certain someone took it out at the source. I wonder who could have done such a thing…
The generator can be found at the back of the Basement’s Storage Room (where you picked up the Starling 2000 Manual). Keep following the route on the right all the way around until you find the generator to restore power. Sneak your way through the Basement and back to the Receptionist Desk where to can safely return to the Studio. However, with the Studio room locked and Peggy having vanished, your time with the Whistling Man has finally arrived. This is where your interview begins. The reveal of the Whistling Man happens here and you can really choice whatever dialogue line you would like as it does not effect the outcome. The real choices begin when Forrest decides to start his interview with the Whistling Man:
- ‘Do you want to die?’
- ‘Tell me why that night‘
- ‘No. Ricky didn’t know‘
- ‘Just a prank?’
- ‘Who was it?‘
- ‘How do you know?‘
- ‘Then why the cover up?‘
- ‘That’s evil‘ (quick time prompt)
- ‘Answer the question‘
- ‘You’ve been through hell‘
- ‘School Gym‘
- ‘Sister?‘
- ‘You should have said‘
- ‘Is that why you attacked Eugene?‘
- Pick up the birthday card with the cat on it, to the left of the table in the Peggy’s room at rotate to see inside.
That was our full guide on how to save everyone in Killer Frequency. We hope you enjoyed this guide and that is helped you get the best possible ending in this Indie Horror Game. For more content from Indie Developers, feel free to look at out GJ recommendations of Amanda the Adventurer, The Karaoke or Midnight Scenes. Thank you for reading this guide!









Published: Jun 15, 2023 09:24 am