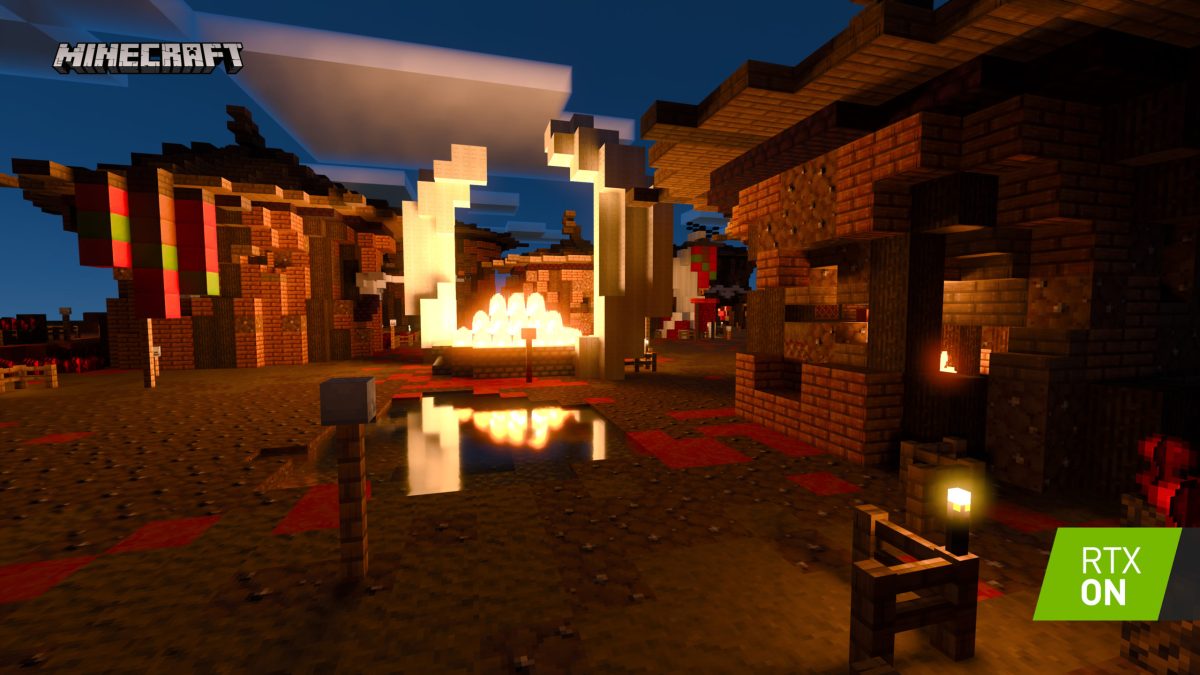
One of the first games to support real-time ray tracing is the top-rated sandbox game known as Minecraft. Ray tracing allows you to experience Minecraft in a whole new light, with impressive water reflections, realistic shadows, and rich environments. Here’s how to enable ray tracing in Minecraft for Windows 10.
Before diving into the guide, you will want to ensure your RTX video card is up-to-date. Open up your Nvidia GeForce Experience application, and go to the Drivers tab. Tap the button on the right that says “check for updates” to scan for and install the latest drivers. At the moment, Minecraft‘s ray tracing functionality is limited to gamers on PC using Windows 10.
What is Ray Tracing?
Before you enable ray tracing in Minecraft, it might help to understand a bit about what it does. Ray tracing is a type of rendering technique for generating 3D graphics. The algorithm essentially simulates how light works by tracing lines for every pixel on the screen. It is more or less a computer algorithm that can figure out how to mimic lightning to make things render more realistically. Nvidia GPUs are finally fast enough to do real-time ray tracing, which is different and often better looking than traditional rendering methods. RTX series video cards now have this functionality included in them, and you can take advantage of the setting in games that support it, like Minecraft.
How to Enable Ray Tracing in Minecraft on Windows 10
Follow these steps to enable ray tracing in Minecraft on Windows 10:
- Open the Microsoft Store and type in Minecraft for Windows 10.
- Purchase the game if you haven’t already and install it on your PC.
- Launch Minecraft by clicking the Play button.
- Tap on Marketplace from the Main Menu in Minecraft.
- Click on the magnifying glass icon, then type “RTX” and hit the enter key.
- Select any of the official RTX packs by Nvidia and install them.
- Go back to the main menu and click on Play.
- Select Create New, and choose one of the RTX World Templates.
- After loading int, press ESC, and go to Settings then Video.
- Scroll down to the bottom, and make sure Ray Tracing is enabled.
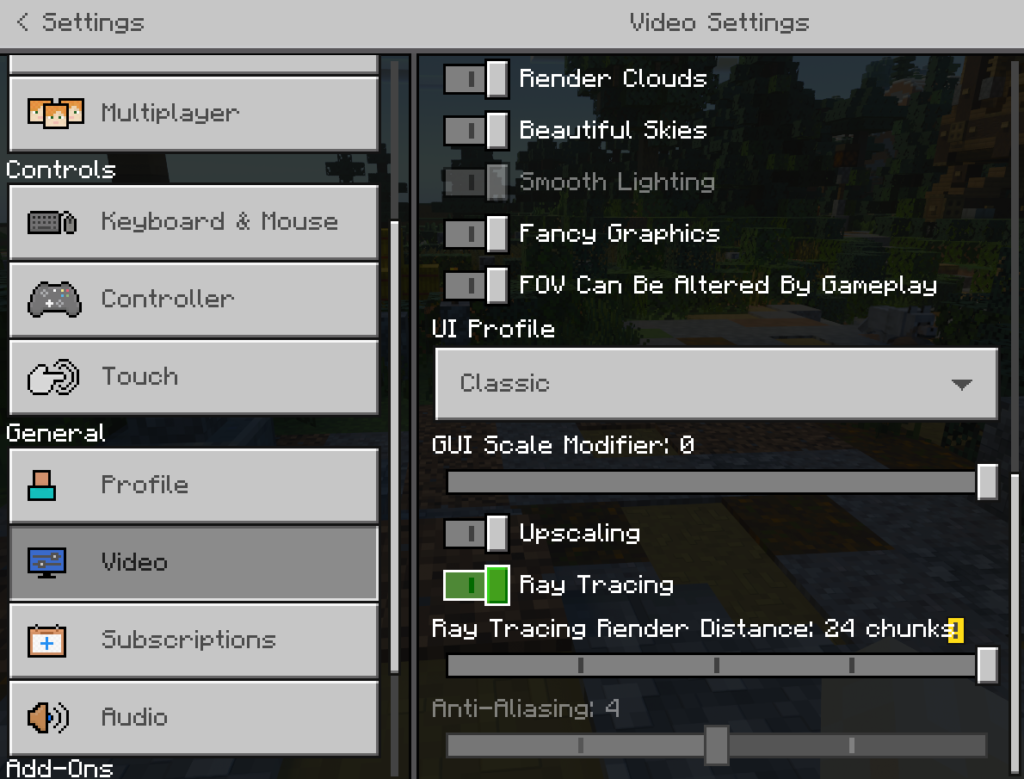
Depending on your card, the default Ray Tracing Render Distance may be set to something lower than 24 chunks. Change this setting to your preference to change the ray tracing distance.
How to Enable Ray Tracing on PlayStation and Xbox
At this time, ray tracing (RTX) is only available on Windows 10. The technology is still relatively new with the latest series of Nvidia graphics cards. While the current generation consoles are capable of ray tracing, Minecraft is not yet optimized for it. We anticipate the feature will be available in the near future. When it becomes possible, we’ll provide a walkthrough on how to accomplish ray tracing for both PlayStation and Xbox.



Published: Mar 15, 2021 11:51 pm