
Now that GTA 5 is free on the Epic Games Store, it’s never been a better time to complete the Pacific Standard Job in GTA Online. There will be plenty of players online trying to finish this difficult finale and we’re here to show you how to make it out with that sweet $1.25 million in our The Pacific Standard Job Heist Guide.
The Pacific Standard Job Heist Guide
With The Fleeca Job, The Prison Break, The Humane Labs Raid, and Series A Funding done you’re ready to take on the heist of all GTA Online Heists. Before even starting this mission, make sure you are stocked up on all the essentials. You wouldn’t want to fail the mission by not being topped off on body armor and ammo.
To start the mission head to Lester who will begin to explain the job in a cutscene. Like with other heists there are a few setup missions before the actual heist. Now, you’re ready to get started on The Pacific Standard Job Heist guide.
THE PACIFIC STANDARD JOB – SETUP: VANS
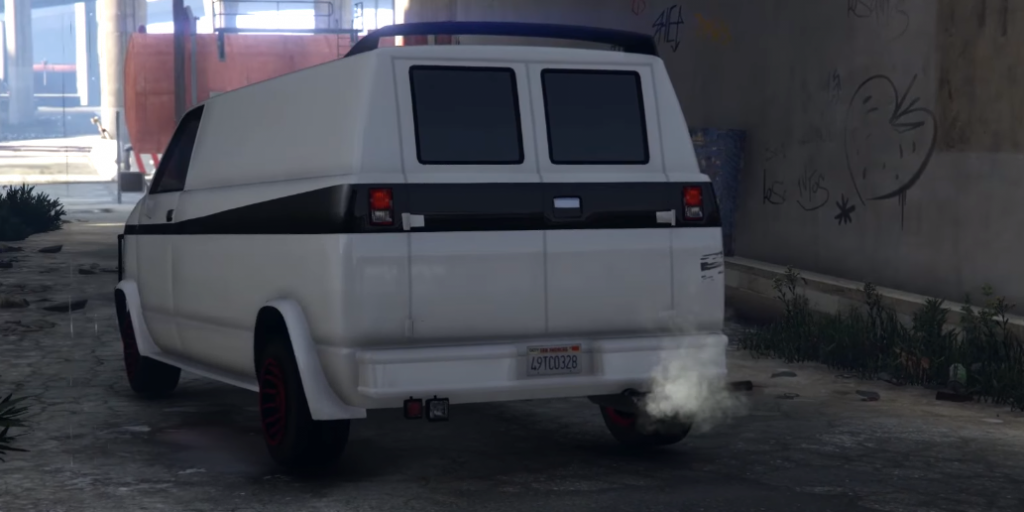
Lester will explain that he needs you to steal Post Op van. The vans are fitted with transponders that can be used to disable Pacific Standard Bank’s dye packs in the last leg of the mission.
Two teams, each with a Navigator and a Driver, are needed to finish this part of the setup. Once the teams have hit the road it’s now time to find the Post Op van.
Navigators need to use the Trackify app on their in-game phone to help their driver find their respective van. The app allows the navigator to direct the driver to the van’s location.
When the vehicle is in sight a picture of its license plate must be taken. Use the phone’s Snapmatic camera app to take the picture. When all the photos have been taken Lester will call and after some dialogue, he will inform you which van he wants you to steal.
Getting the van is standard GTA here. There will be little resistance. Steal the van and take it back to Lester’s.

THE PACIFIC STANDARD JOB – SETUP: SIGNAL
Lester now needs the transponder taken to signal expert/fugitive Avi Schwartzman. Avi is a bit eccentric but has agreed to tune the signal of the transponder you’re bringing to him.
This part is a solo mission, so no coordination is required. The first bit of the mission is also very simple.
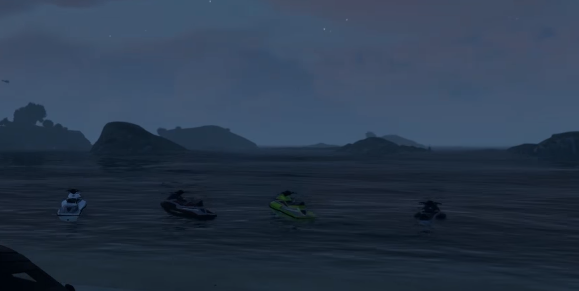
After beginning, the marker will lead you to some jet skis on a beach in North Chumash. Take the jet ski out to find the island, but do not be reckless. You will find that the island is crawling with cops and a helicopter patrol.
We recommend taking things slow and sniping most of the cops before getting close. There is a smaller island nearby that has a good vantage point. It would also be smart to take the helicopter out of the equation with your rockets from here.
Once you feel you’ve taken out enough cops you can start your approach. There will still be many enemies to face. If you have a crew this should be relatively simple. Make your way towards the marker to meet with Avi.
With Avi, head to the boat marked on the map. (Note: if you have a crew of four, you won’t all have a seat on the boat as it only seats 4, and Avi will take one.
Once you are on the boat a new marker will appear taking you under a bridge. When you reach the bridge, Lester will warn you that your time window is closing and a timer will start.
Head down the river, avoiding the rocks, until you reach the lake. A yellow marker will appear in the lake and upon reaching it you will be told to get rid of the cops chasing you.
While it is tempting to lose the cops on land, it may be simpler to head back to the middle of the lake. Once you’ve lost your wanted level, take Avi to the marker. He will follow you into a vehicle to speed things up.
Once Avi is at the dropoff, the mission will be completed after a short cutscene.

THE PACIFIC STANDARD JOB – SETUP: HACK
This next setup mission has you stealing a hacking rig needed for the heist. It belongs to another crew out in Vinewood and they aren’t willing to share. Two teams are needed for this mission. One Transporter and three decoys make up the crew.
Take the white mission van to Vinewood Boulevard. There are a lot of enemies here so keep your eyes peeled. Kill everyone in your way and keep an eye out for snipers. We recommend using the entrance for cover until all the snipers are taken care of.
Approach the marked black van and have the Transporter steal the equipment from it. The transporter should then take the equipment to the white van.
Before the white van leaves, the decoys should now enter the empty black van and leave. The decoys will then be prompted to lure the rival heist crew to Aguja Street. The white van should also start to head towards their destination at Lester’s Factory.
The black van will have many enemies chasing it and everyone should be trying to take out as many of them before they become overwhelming. After the white and black vans have reached their destinations, destroy the black van to complete the mission.
THE PACIFIC STANDARD JOB – SETUP: CONVOY
Lester now needs the charges to blow open the bank doors in the heist. To do that he needs you to first steal a Merryweather convoy truck in Blaine county. This mission has no teams, but can be difficult. Teamwork is important to get out with the truck intact.
When the mission begins, we recommend each player taking their own vehicle to create a roadblock at the ambush point. The goal is to steal the military truck in one piece, so avoid using explosives.
As the convoy approaches, take out the chopper first. Your sniper rifle will help you do this before it even gets close to your ambush. When the rest of the Merryweather convoy reaches the roadblock, kill everyone, but try to avoid destroying the vehicles.
After the enemies are dealt with two players should take the marked military truck. If the Insurgent survived the other two players should take that and drive ahead of the truck clearing out any opposition.
When you are almost at the marker you will get a new mission briefing to escape Merryweather. There will most likely still be stragglers chasing you down. Kill them while making your way to the new marker.
Once you deliver the truck to the drop-off the mission is complete. You will also get the Savage Chopper available for purchase as a bonus reward.
THE PACIFIC STANDARD JOB – SETUP: BIKES
The last setup mission sounds simpler than it is. Lester wants you to steal some sports bikes, sound easy right? Not if the Lost have anything to say about it. They have set up roadblocks along your path that make things difficult.
Just like the last mission, there are no teams but we recommend sticking together to get all the bikes out safely.
Once the mission begins, head down to the Lost Clubhouse where there will be lots of enemies to kill. This is another mission where you should avoid using explosives to avoid destroying any of the bikes. The bikes you are looking for are Lectros, not the usual Lost choppers.

Once you have the bikes, we recommend using a trick to avoid the roadblocks set along the path on the GPS. Upon leaving the clubhouse the GPS will want you to make a right, however, if you drive straight for a little before making a right the GPS will recalculate a much safer path.
If you choose to follow the GPS you will find a much tough fight ahead and are very likely to lose a couple of bikes on the way. Either way, your destination is the same.
The GPS will take you to the marker, which is found behind a building off of the street. Once you drop off the bikes, you’re ready to start the heist.
THE PACIFIC STANDARD JOB HEIST GUIDE
Before taking on this last mission all crew members should have the Heavy Utility Vest saved as a custom outfit. When setting up the heist the host player must select the ‘Heist Clothing’ and set it to ‘Player Saved Outfits’. With this setup, all team members can equip their own Heavy Utility Vests.
This last mission requires three teams, a Hacker, a Demolition and two on Crowd Control.
After a cutscene of Lester explaining how “easy” the mission is, everyone should take one vehicle to the mark on the GPS. Avoid getting a wanted rating as that will fail the mission. If you are trying to make the time objective, completing the mission in under 10 minutes and 15 seconds, we recommend using the Akuma bikes from the Eclipse Towers apartment building.
Upon arriving at the bank head to the door and a cutscene will play. After the cutscene, the two Crowd Control members will need to kill the security guards and intimidate the hostages.
Shoot next to the hostages to keep them intimidated. Keep an eye on the yellow bar to keep track of the intimidation level of the hostages, or else they will pull the alarm. If a hostage dies, NOOSE will arrive, preventing you from completing the “NOOSE not called” Elite Challenge.
While Crowd Control is doing their thing keeping the hostages at bay, the Demolition and Hacker members should move towards the vault. The Demo needs to place a charge on the metal door made of bars in the bank lobby. When the door is open, Demolition will then have to place another charge on the second door at the top of the stairs.
When the second door is open one of the crowd control members needs to begin intimidating the newly accessible bank tellers as well as take out any security guards making their way down the stairs.
With this area under control, the Hacker needs to open the vault door using the terminal on the wall next to the vault. The hacker must use the handheld pc and select ‘My Computer’, then ‘External Device’, and lastly the ‘Bruteforce.exe’ to begin the hacking minigame.
Now that the vault door is open the Demo must open one last door with charges to finally access the loot. When the Demo and hacker begin taking the money an alarm will set off.
Regroup back at the front of the bank after taking the money. There are tons of cops waiting outside the door, so be careful. Once the doors are open there is no going back. Staying in the bank will result in a failure.
When instructed, leave the bank through the double doors. This is where your Heavy Utility Vests come in handy. Although you might walk a bit slower, you can move slightly faster by jumping while moving.
Rip and tear your way through the police and make your way through the alleyways and make your way to the bikes you stashed in the setup mission. Be careful not to use explosives in the alley. The tight corridors make it easy to destroy the bikes.
When you reach the bikes take a second to shoot the crates against the wall. Grab the body armor inside the crates. A timer will start when the crew gets inside their getaway vehicle(s).
Using the bikes to make your getaway is actually optional, but there might not be a car available to drive. There are different tradeoffs between using four bikes or one car. Use whatever you feel is best for you, but if you are looking for the time objective, we recommend bikes.
Drive like the wind and follow the marker towards the canyon. Keep ahead of the police and avoid colliding into roadblocks. This is the toughest part of the mission and there is a good chance you will have to repeat this part.
Your objective is to reach a boat in the river at the bottom of the canyon. If you follow the GPS it will take you to a cliff where they want you to parachute to the bottom of the canyon and to the boat. You can avoid the jump by driving around and making your way to the dirt path in the canyon, or if you are confident in your driving skills you can drive down the face of the cliff.
Whatever way you reach the boat, the whole crew needs to be inside the boat to start the next objective. Once inside the boat, take it to the objective marker and you will have completed the heist. Congratulations! You’ve finished the hardest and last heist GTA Online has to offer!


Published: May 16, 2020 02:21 am