Bendy and the Dark Revival released November 15th, 2022. The sequel in the Bendy Universe follows our lead protagonist, Audrey Drew, daughter of Joey Drew. The animator finds herself in a nightmare far worse than that of a creative block. Tricked and taken by the antagonist, Wilson Arch, Audrey is thrown into a world of hostile, animation abominations. Stalked by the Ink Demon, watched by Wilson, how will she escape? This is our guide to beating Bendy and the Dark Revival Chapter 1.
Dark Revival Chapter 1 Prologue
Office Keys
The game starts out simple for us players, we really only have one place to go similar to that of any ordinary linear first-person horror game. Your first task is to fetch your Office Keys, these can be found on the desk where Audrey was working at the beginning of the game. After grabbing the keys head back to the door to unlock it. The horror starts right away with a bucket and mop moving on its own (anything is better than those darn wheelchairs at this point). Follow the corridor and go to the elevator, interact to bring the elevator to your floor. Go inside and you will see a cutscene where you are introduced to the incredibly-charming-and-not-at-all-creepy Wilson. Watch the cutscene until we can play again.
Follow Wilson
After your pleasant conversation with good old Wilson, the elevator stops working. You and Wilson must venture out into the dark and ominous hallways. Your objective here is to follow Wilson. Simple enough (if it was not for the slowest walk cycle in the history of video games). When Wilson eventually gets to the door, interact with him (you will see a glow around his model to indicate that you can speak to him). Continue to follow until you see that indication again. Watch the cutscene. Wilson will tell you to find the exhibit statues that go onto the corresponding pedestals in the room.
Find the Exhibits
Now on your own (where you can appreciate walking a normal human speed), head back to where you came from. You will see a wrench in the wall before the door. Interact to take. This is one of the exhibits. The other 5 exhibits can be found in these locations:
- Go into the room with exhibits in glass stands. Turn right from the Boris toy exhibit stand. On the table there is a typewriter and a record player. Press the interact key to take the Vinyl.
- To the left of the table with the record player and typewriter, there is a chair with a bendy plush toy on it.
- Follow the wall round from the toy. You will find a book titled The Illusion of Living on the bookcase.
- To the left of the bookcase, underneath a painting, there is an ink bottle. Take this too.
- On the wall opposite the desk with the record player on it, there is a green box hanging up with a Cog symbol on it. Interact to open the box and take the cog out.
Return to the room with Wilson in it. There are three stands on your left and three on your right. Simply interact with the exhibits and Audrey will place down the correct exhibit on each stand. After this Wilson will talk to you and tell you to turn on the power. This is the switch in the room that the wrench was originally in. Watch the cutscene. Congratulations! You have just fallen right into Wilson’s trap.
Dark Revival Chapter 1: Drawn to Darkness
A New and Peculiar Yet Horrifying Place
Audrey awakes in the Ink World, her biological body morphed into something bizarre and full of black ink. First, pick up the memo on the desk. Open the drawers and take the two bars. Place the bars on the ladder in the corner of the room. You can now climb up. There is another Memo on the desk up here that you can read. Go ahead I’ll wait. Crouch under the broken metal door and continue to wander through this new environment.
There is a memo on the barrel to the left and a locker on the right. These can be used to hide in if there are enemies nearby. For now, though, you do not have to worry about any enemies. On the other side of the barrel (behind the wall) there is a locker which you can search. You will pick up some Gent parts inside. Continue to walk down the corridor, wading through the inky waters and climbing up and around this corridor. There is another memo you can pick up on the barrel to the right after rounding the corner. The metal door at the end of the corridor will slowly open so do not move from here, just wait until you can walk through.
Security Door
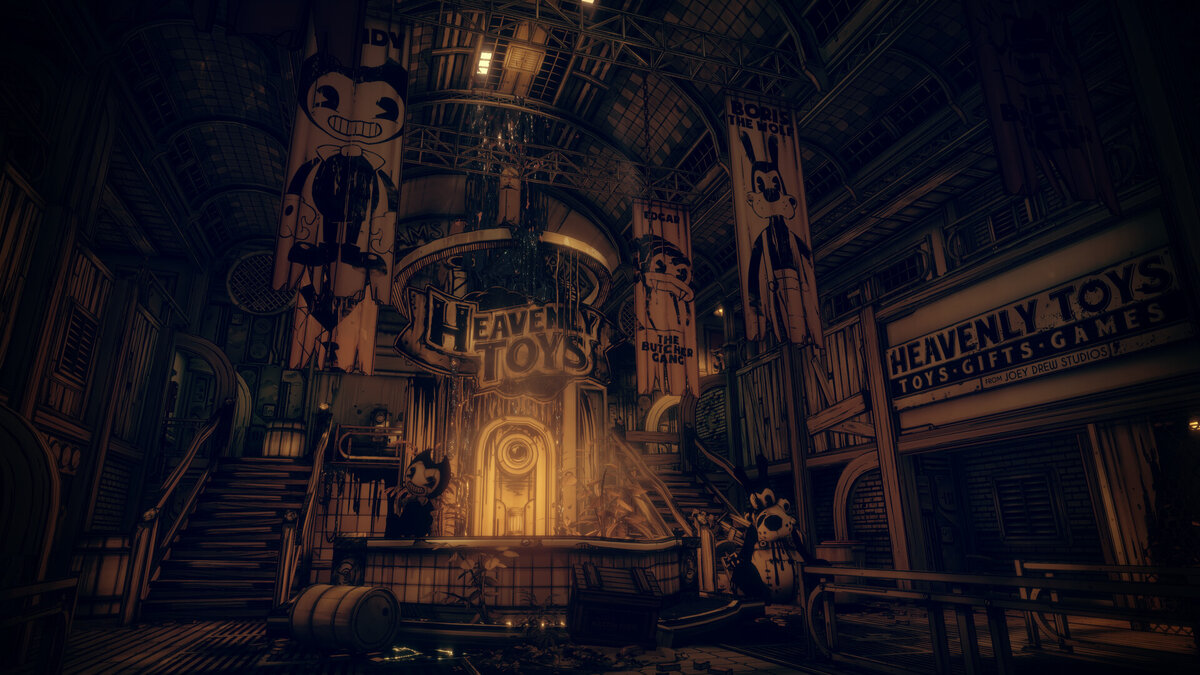
Jumpscare warning in this corridor. Go to the end to pick up an audio file on the desk on your left. Climb the wall to the right of the desk (made obvious by the highlighted glow around the interactable object). On your left there is a security locked door, go right to override the lock via the security override lever. Follow the path into the corridors following on from the security door. As you approach the wall with a giant graffiti Bendy, turn left. You have made it to Heavenly Toys.
Go left and inspect the drawers with art stationery and books on it. In the left drawer is a Gent Battery that you can pick up. Go up the stairs on the left and interact with the lever on the left wall. This will not work. Go to the opposite side of the upper floor, interacting with the wall to jump up. Piper is here, after the cutscene you need to Run and Hide from him.
Run and Hide
The only place available for you to hide in right now is the locker in the room. As we all probably guessed, Piper finds us. Watch the cutscene play out.
Find Some Food
When you have taken too much damage from enemies, players can replenish their health by eating food. After exiting the locker go to the fountain and interact with the chest, consuming the food inside it. Another cutscene will play here, this time we see Allison Pendle or Alice as she is referred to by other characters in the game.
Escape the Studio
Door Code
Go back up the stairs on the left side and climb up the wall on the right. This time Piper is not here. There is a memo on the chair in front of you. Turn left and go through the door. Round the corner and walk up to the mirror to initiate another cutscene. Turn left again from the mirror and crouch to get past the obstacle. There is an audio log on the desk. In this room there is a Security Lock. The code to this is 451.
Press the button to open the Security Doors. The door behind you will open. Head through, pick up the Gent Parts. There are Chips on the desk also. Go down the stairs and listen to the audio log on the desk of Wilson. To the right of the desk there is another wall which you can climb up. Go down the corridor and jump down off the left platform.
Finding the Maintenance Key
Crouch under the broken metal door and use the lever on the right to open the Employee Lockers. Go back up the ladder but turn left this time, instead of going back to where you were. You can search the locker in this room. In the third locker on your right there is a Key. Pick this up. There is the consumable item, Soup in the first locker. Leave that in case you take damage later on. Interact with the mystery vial in the room. These Thick Ink Containers give you an upgrade. You can place this in either Health or Stamina. We recommend Health for now. There are more Gent Parts to pick up in the locker beside the Ink Container.
At the back of the room, wheel away the cogs and metal beams in the moveable container. Use the key you found in the locker on the door to get into Maintenance. Interact with the metal door to open. Walk through and crouch at the end of the corridor. Go left to the gate (another jumpscare). Go right in this room and open the door. There is another locked door in this room which you need to break.
Break the Door
You can find a memo, a Gent Battery and Slug Tokens on the desk in the first room on the left of the locked door. Keep walking left. On the desk on the right of the room is a Gent Battery, pick this up before you talk to Alice via the speaking tube.
Hide from Striker
As soon as you stop talking to Alice, Striker will enter the room through the ceiling. We recommend getting to the room on the right (where you obtained the Slug Tokens) and hiding in the box in the corner of the room. Go to the far side of the room, opposite the speaking pipe and look into the wired fence on the left. You will see a body strapped up to the wall on display, the Gent Pipe needed to break the lock on the door is here.
Restore Power to the Atrium Supply
Return to the speaking pipe where you spoke to Alice. You will see a cutscene of a hostile Lost One entering the area. Wait until the Lost One is coming up to your right, and walk past, whilst crouching to go into the area where he came from. You need to find a fuse to put in the Atrium Slot. The Lost One is still patrolling the area, wait for him to walk around the benches on the right. He will start heading to the Atrium door. Backtrack and head into the Little Devil Lounge after walking past the giant cardboard cut-out of Striker against the wall. Inside the Lounge another Lost One appears.
Stealth
Wait for him to patrol until he is on the left side of the room, messing with the radio. Now is your chance to get around the bar and into the Kitchen. Open the door in the back of the Kitchen and pick up the Gent Parts and Battery on the shelving unit on the left. The Fuse can be found on the cake in the corner of the room. There is a door in here that requires the Gent Pipe to open. Remember this for later.
Now you need to get past both Lost Ones, one in the lounge and one in the main area. hide in the box in the Kitchen and wait for the Lost One to put in an order in the Kitchen. Follow the Lost One out into the Lounge. Keep about a metre distance in between yourself and the Lost One. Too close and he will spot you. Too far and you will not have enough time to get past him when he is distracted. He will return to the radio, continue crouch walking to the left, using the covers of the tables and the shelves to hide you from his line of sight. Return to the room with the Fuses, avoiding the other Lost One by using cover and waiting for him to pass you. Place the Fuse to turn the lights on in the Atrium.
Get to the Gent Pipe
You need to get past the Lost One once more, crouch walk, and use covers as you have been doing so far. Wait until the Lost One patrols the area and returns to the door to the Fuse room. Use the cover in the middle of the room to get round him as he passes you on the right. Stay crouched or the Lost One will hear you. There is an audio log you can listen to on the chair in this room. Turn left and crouch through the hole in the wall. Continue walking left. On the desk in the far side of the room is a Memo and a Gent Battery for you to collect. To the left of the desk is a door. This takes you into the room behind the wired fence.
Fighting with the Gent Pipe
There is a lot of items on the desk including: Chips, Battery, Parts and a Casing. Consume the chips if you took any damage in the stealth parts of this Chapter. Now you can interact with the body and take the Gent Pipe. The Gent Pipe will be your trusty tool throughout the game, useful for combat and opening doors. The Lost Ones take 3 hits with the Pipe to take down. You can loot Lost Ones bodies. After taking down the Lost One and going around the corner 3 more Lost Ones will attack you so be ready. Again, these take 3 hits to take down. You will want to keep a good distance and swing; the Lost Ones need to get close to hit you, but your Gent Pipe’s reach is far.
Creating Shortcuts
If you take damage in this fight, use the Pipe on the parts of exposed brickwork in the walls to create holes that you can use as shortcuts or to find secret areas. In the wall beside the Bendy cut-out, break a hole and crouch through, here you will find a sandwich to regain some health back and a Memo in the cabinet in the corner. Break the other exposed part of the wall to go into another new room. In here there is a Memo on the desk. The door leads back into the main area. Stay in the room and go left instead, crouching into a hole and breaking the wall on the other side. You can pick up a Battery here.
This path takes you back into the Lounge. You can eat Donuts off the Diner tables if you still need health back from the Lost One fights. You should now head back to the locked door that is needed for the Gent Pipe. Remember that Striker can still appear from the ceiling so go slow and quietly if you do not want to be spotted.
After Breaking the Lock
Pull the lever on the left-side of the room, beside the black pipe in the corner. Crouch through the wooden planks covering the doorframe next to the black pipe. Wade through the inky waters where you will see a cutscene. After getting out of the ink, pick up the Battery on the desk on the left then continue walking right, opening the door. You will see another cutscene, this time of a Searcher. Approach the Searcher and Banish, using your new powers. Search the lockers on the left to get two Gent Batteries and Parts. Go right and open the locked door by swinging the Pipe onto the lock. Approach the big gap in the floor to see a short cutscene.
Find a Way Across the Abyss
After being turned around in the cutscene, head to the right. You will see a Card Exchange Station where you can exchange parts for other loot. The lockers opposite can be searched for more items. Return to the gap that you could not jump over. Wheel the moveable container with cogs and metal beams backwards so that you can open the sliding door behind it and crouch into the next room. Pull the lever on the right side of the room.
Dealing with the Lost Ones
Go back into the first area, there is now three Lost Ones in the corridor. Wait in the room with the lever, watching through the wired fence to see where the Lost Ones are patrolling. Two Lost Ones will approach the gap and then go back down the corridor, the other Lost One will continue her patrol to the left. When the male lost one is walking down the corridor, crouch walk behind the first female Lost One who will be walking away from the gap. Banish her. The male will be on the other side of the door in front of you and the other female Lost One will still be patrolling on the left.
After Banishing 1/3 Lost Ones you can either head back to the room which you need to crouch to get into or you can head to the door at the end of the corridor. By choosing the first option, wait until the male Lost One does his patrol to the gap again, then sneak up to him and Banish. Keep in mind that if you choose the second option the male Lost One is likely to see you. If he does, just run and crouch walk into the other room. They cannot reach you in here. Wait here until the Lost Ones resume their normal patrol, sneaking up on the Lost One that heads back down the corridor. Banish this Lost One when you get close enough.
Walk through the automatic door and into Animation Alley.
Animation Alley
Interact with the Studio Tour audio logs on both sides of the room if you want to. As you listen to Joey Drew talk, however, keep in mind that a Lost One is still on their patrol. Listen out for dialogue lines and the automatic door opening. If you hear it make sure you hide behind cover. You can sneak up on this Lost One and Banish. After listening to Joey Drew, go back to the door you came in through, to the left it is a Security Override Vent, you can break the cover using the Gent Pipe and crawl inside. On the other side you can pick up items: Gent Parts, Slugs and read a Memo. Pull the lever at the back of the room and head back into the Studio Tour.
Head to the back of the Studio Tour room, the Security door to the Main Studio is now unlocked. Go down the stairs to meet the mascot of the Bendy Universe, Bendy himself. After your cutscene with Bendy, follow the path. Knock on the door with the sign: ‘Don’t Knock’ on it and watch the cutscene.
Search Animation Alley for Pictures
The Lost One requires Pictures for him to open the door. Open the Maintenace door on the left-side of the room. Walk through and crawl into the vent on the other side of the room. On the other side of the vent Audrey is introduced to the Ink Demon, only through his voice, however. Open the door by breaking the lock using the Pipe. Continue following the path as there is only one way to go. Crawl through another vent. Turn left and head down the stairs and then turn right. Before heading into the dark corridor, open the locker in the corner to find a Memory. Epilepsy warning for the cutscene when obtaining the Memory.
Go down the dark corridor and interact with the lever on the right. But watch out behind you, the Ink Demon is here to devour you. This is the end of Bendy and the Dark Revival Chapter 1.
Related: All Bosses and How to Beat Them in Bendy and the Dark Revival.


Published: Nov 19, 2022 01:34 pm