Destiny 2 Armor Picker is up there with DIM in terms of powerful external D2 tools. Like DIM, it has a loadout optimizer. Unlike DIM, that loadout optimizer is Destiny 2 Armor Picker’s sole function and purpose. So, naturally, I’m going to show you how to use the Destiny 2 Armor Picker.
By learning how to use the Destiny 2 Armor Picker properly, you’ll be able to optimize your loadouts and builds to achieve the exact stat totals you’re looking for. With its tools, you won’t need to spend hours in the tower going through your vault to find armor with the right stats you need. Instead, the app does it all for you.
How to Use Destiny 2 Armor Picker
Log in and Pick Your Class

When you first load Destiny 2 Armor Picker, you’ll be asked to sign into your Bungie account. Click on the login button and you’ll be redirected to Bungie.net’s sign-in page.
Log into your Bungie account from here using whatever platform you play Destiny on. You’ll need your platform account and your Bungie account linked to do this. So, if you haven’t done that before, do it now.
Once you’ve successfully logged in, you’ll be redirected back to the Destiny 2 Armor Picker home page.
Input Your Variable Settings and Stat Requirements
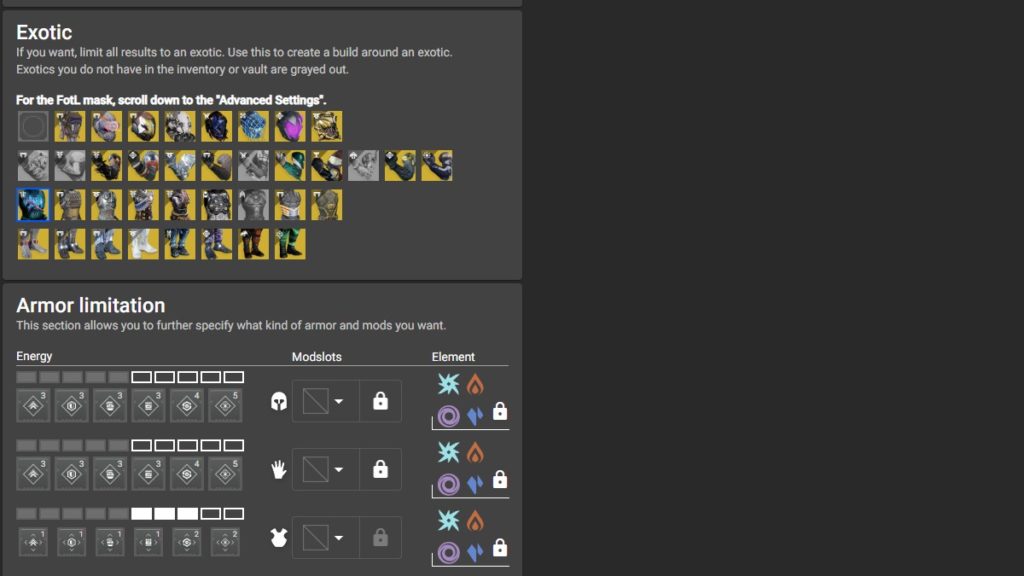
Don’t let all the options overwhelm you. A good 70% of the things you see here are useless to you. Out of the five tabs at the top of the page – the only one you need to worry about is “Home”.
On that Home page, you’re going to see quite a lot of stuff. Again, don’t get overwhelmed. Once you take the time to read through everything – you’ll realize it’s not as complicated as it seems.
- At the top of the page, you’ll be able to pick whichever one of your three characters you want to use. Select the character you’re building for here.
- Below that, you’ll be able to select the stats you want to achieve. Before you plug your desired stats into that, though, you’ll want to continue scrolling down to the next section.
- Beneath that, you’ll be able to select the Exotic you want to use with this build. This will force the app to use that Exotic in any builds it creates for you.
- The armor limitation section beneath that isn’t too useful unless you’re not able to use stat-boosting mods on any of your armor pieces. If it is a case where you don’t have energy for a stat booster on any given armor piece, just modify the energy usage in this section and the app will take that into consideration.
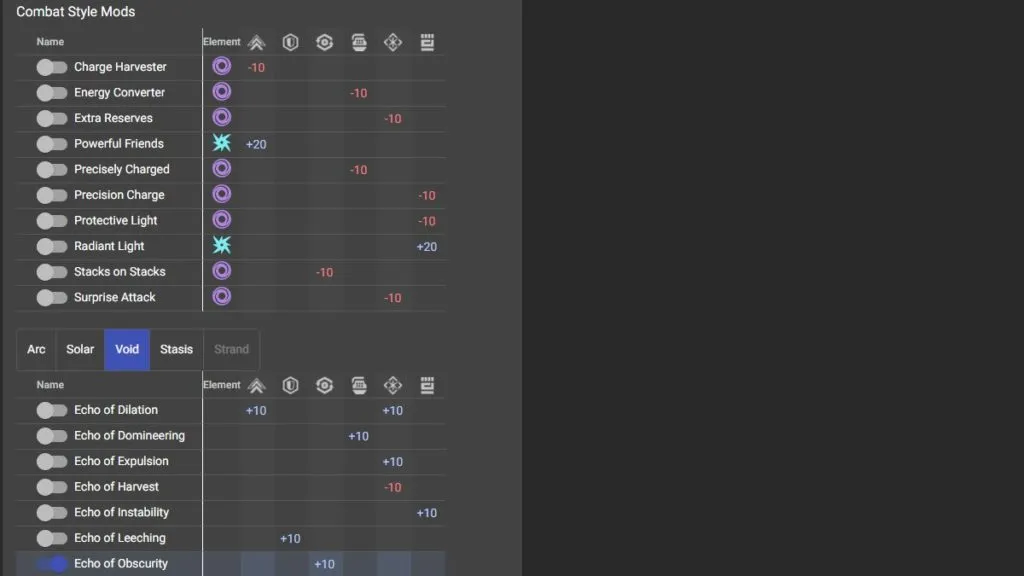
- Underneath that is a section containing all the combat-style mods that modify your stats. You can toggle which of these you’re using in your build, and the app will take them into consideration when calculating what total stats you can achieve.
- Last but not least, underneath that is a section for each subclass Fragment that affects your stats. Again, you can toggle whichever of these you’re using here.
Below that is some configuration options and advanced settings. You can play around with them if you want – but you don’t have to.
Input Your Desired Stat Totals
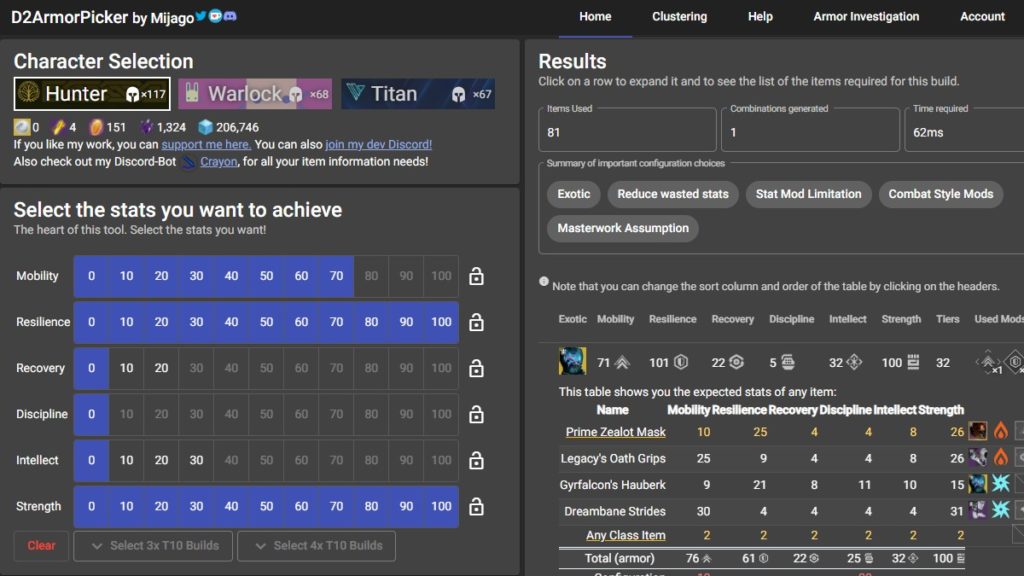
Once you’ve gone ahead and entered the following information into the Destiny 2 Armor Picker:
- The Exotic you’re using.
- Specific mod limitations you have.
- Any stat-altering mods you’re using.
- Any stat-altering Fragments you’re using.
You can finally scroll back up to that stat selection section. This tool lets you input what stats you want in your build. Keep in mind that it will only let you input stat totals that are possible to achieve with your current limitations, mods, and inventory.
You’ll be able to select between 0 and 100 for all six stats at first, but once you select your first 100 stat option, the tool will unhighlight any options for other stats that are no longer attainable.
Generally speaking, you’ll want to input 100 for your two most important stats, then take whatever you can get for the rest of your loadout.
Check Your Results
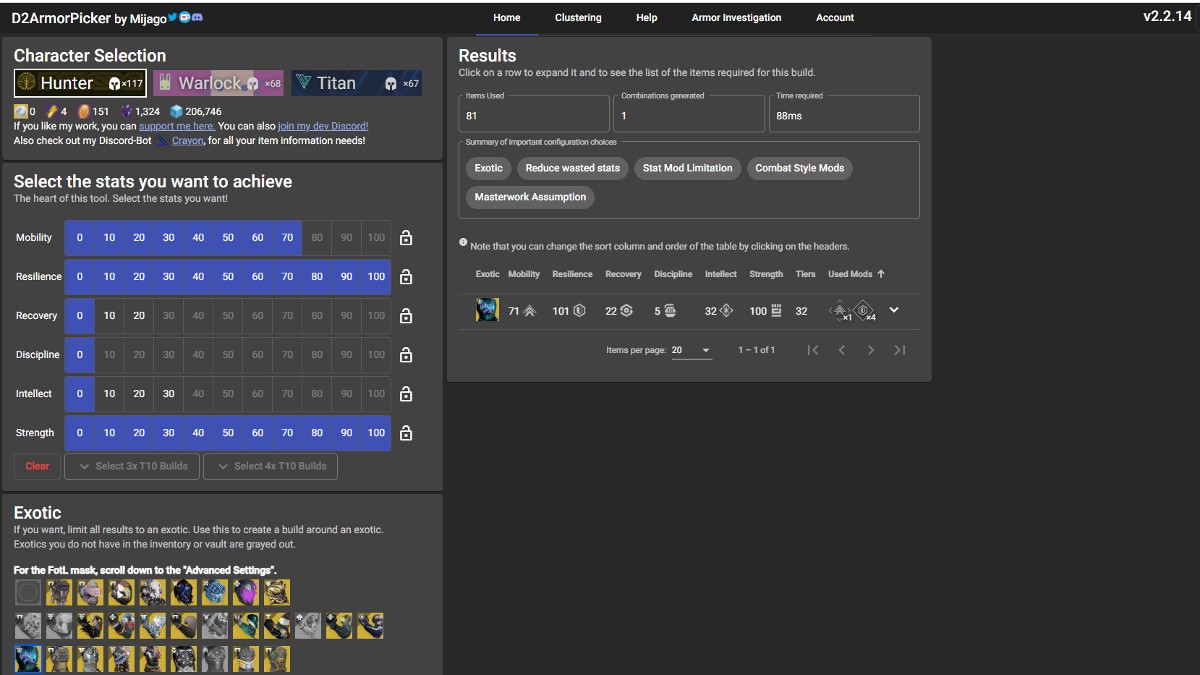
After inputting all of your stat options, you’ll be presented with a list of loadouts at the top of the middle column – next to the stat selection tool. If you click on any of these loadouts, you’ll get a dropdown menu showing you what armor pieces the loadout uses, and what mods it uses.
From there, all you need to do is log into Destiny and copy the loadout. Provided you fed the app the right information, you’ll have the stat tiers you’re looking for.









Published: Nov 6, 2022 11:29 am