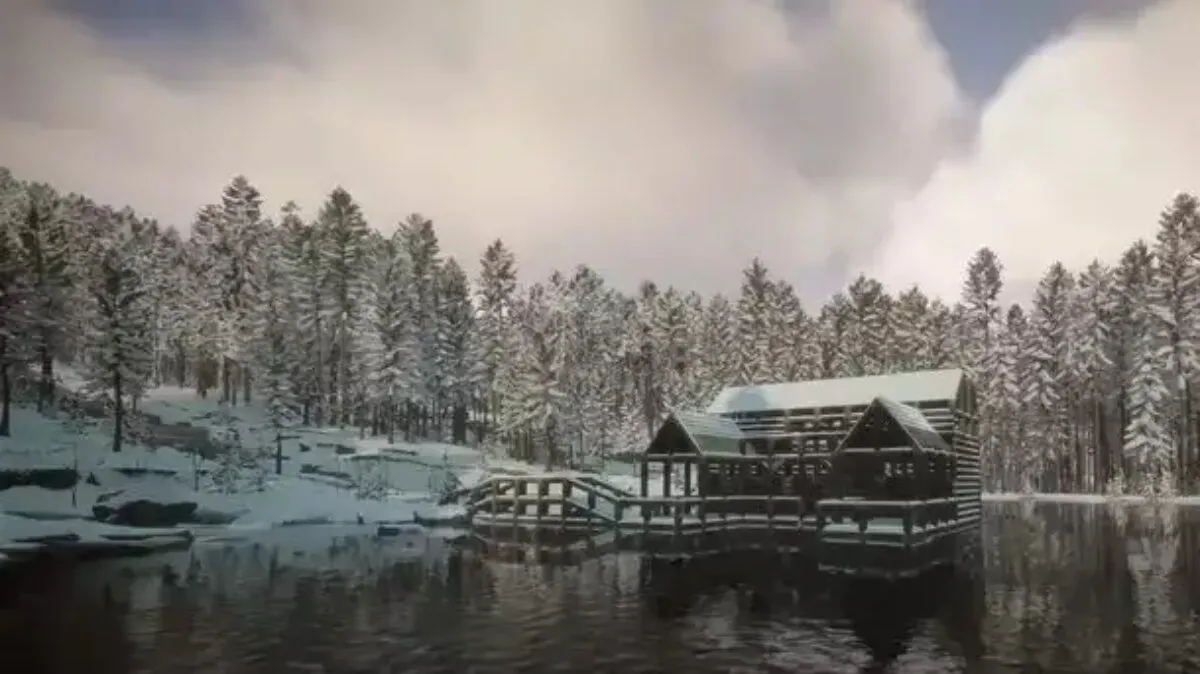
Make yourself at home on the Island by building yourself a Water Base. Whether you are trying to get some peaceful alone time away from the Mutants and Cannibals or looking for a regular supply of water until Winter hits, a Base floating over a river is the perfect spot to turn into your Headquarters as you leave for more supplies or progress through the story in Sons of the Forest. Making this Base however can be difficult and will require a lot of patience for its completion. However, depending on what type of Water Base you want to make will determine just how long its process of building will take. For those looking to build themselves a Water Base, this guide will show you how.
How to Build on Water
The first and most crucial step into building on water is that you must build during Winter. This is so that you have a floor to stand on to build, being the frozen-over lake/river. When Winter hits you want to create a fast-travel point to and from the Base, so that you are not spending too much of your gameplay walking back and forth with planks. Therefore, you need to require the Rope Gun for this part. What you need to do is create a small vertical structure of two wood pillars. One is pointing straight up with the second pillar diagonally placed onto the first pillar as if it is leaning on it. You want this placed close to the frozen lake and not on top. Next, point the Rope Gun and send a Zipline onto the top part of the vertical pillar, facing towards the water. You need to walk out with the Zipline in hand to the section of the water where you want the Base to start.
By creating this Zipline you can now use this as a system to send over logs needed for the Base. Of course, this will be a lot of materials but originally, send down 10-15 logs to get started. Because the water is frozen-over you are able to build straight onto it, meaning that you can begin your building of your Base which will become a Water Base when the ice thaws out. If you want to also, you can begin to stack your collected logs together in a tight bundle so that it is easier to take from, this will also help you keep track of how many logs you have with you for your Base. You can keep adding and pulling logs from this pile or head back to land to add more logs onto the Zip before you begin your build.
Water Base Building Guide
To build a Water Base, you need to work on it in a specific order so that when the water thaws out your Base will remain, either floating or bridged from the land. These are the steps that you must do to complete your Water Base:
- Begin with building the Base’s Foundation. The Foundation will determine where your Base sits so make sure that when angling the first log for the Foundation, you are picking the exact spot where the Base will take shape and flow from that point in the river.
- Plan out the size of the Water Base as you will be crafting the floor plan first. Refer to real life wooden cabins and buildings across the water for inspiration on how you want your Base to look. You can create a Base however you like, similar to Minecraft, so the choice is all yours on how big you want your Base to be. Of course, the smaller it is the less work to build but seeing as you will need bridges to get to your Base, the building process is long either way.
- Start with a large base to build your structure on, that way you can remove any excess material from the Base upon completing it.
- With your floor plan completed, you need to create a Bridge. Your options are Wooden Bridges, Rope Bridges or Ziplines. Of course, Ziplines are the easiest and quickest option to execute, however for aesthetic, you may want to create either Rope or Wooden Bridges. Bridges can only be made on water through the use of an in-game bug. This bug could later be patched in a future update or on the game’s full release.
- When you have completed your Bridge, beginning adding walls to the centre of the Floor plan. If you are looking to add multiple levels to your Base, refer to out guide to build stairs here.
- At this point, you can begin to build the interior and exterior of your Base however you would like it to look. Treat this point as a moment of pure creativity and creation. If the ice has not thawed out, you can create the exterior walls as if you are building on land like making an typical Sons of the Forest Base.
Remember that you should be completing the exterior Walls last, so focus your time on what the interior looks like. Whilst you are creating, especially if you have multiple floors to your Base, make sure to link it to your Rooftop as you build so that it is all connect and a strong structure. Finally, when you are happy with your Base, install Ziplines to the land nearby, preferably in trees so that you can fast-travel to and from the Base to easily get supplies or continue your exploration across the Island.
How to Build a Wooden Bridge on Water
The Wooden Bridge is the hardest Bridge to execute and for that reason we are going to detail how to craft one for your Water Base. You should create your Bridges during Winter. If the Season ticks over, make sure that you stay incredibly close to the frozen lake/river as the ice should not thaw out in Spring if you are close to the body of water. If you move too far away however, the lake will revert back into being a flowing body of water. So for those reasons, you should complete your Bridges after you put down your Foundation and before you begin adding Walls to the Base. Do not save and restart your game as the river will be thawed out for Spring.
To start your Bridge, you need to make sure that your Floor panels end in an odd number. That way you can build on the centre of the Foundation, making your Base perfectly symmetrical. Of course, if you want Bridges you need to make sure that you have placed your Base in an appropriate spot for multiple Bridges, putting it between different lands/islands.
To create an Arched Wooden Bridge, you will need to place a pillar down vertically. This log needs to be placed where you want the Bridge to start, i.e. the centre of the Foundation. Then pick up two more logs and install both, one after the other so that you create a square shape. Once down, chop into the last log (standing vertically) at the bottom to create a tiny pillar. Afterwards, leave that small pillar where it is and angle a log to diagonally sit across from the Foundation to the small pillar. You have created your starting point for the Bridge. To continue, you need to place these logs in a line following on from the beginning of the arch.
To create the arch in the Bridge, line up your next log and chop it halfway, then place another log to sit diagonally across from the small pillar to the half-sized pillar. Continue this by adding the next log and not taking the axe to it. Add another to lift the first log up to create that square shape. You can now begin your flat surface section of the Wooden Bridge.
What to Do if you Fall into Water
When the ice inevitably thaws out, you can install Ziplines from the Base and into the water underneath. You should do this when the lake/river is not frozen over. Just stand on your Base, before you build the walls and point the Rope Gun from the corner of your Base out into the water below. This will allow you to use the Zipline back up so that you do not need to swim back to land and take your Bridge back every time you accidently fall in.
Keep this Zipline in mind of where you placed it however as you will need to either create a small platform on the outside of your Base as a walkway away from the exterior wall of your Base or to pull the Zipline into a window so that you can get to and from this Zip if you were to fall in. You should place four Ziplines in total to cover either side of the Water Base so that you are spending little to no time in the water.
That was our full guide on how to build a Water Base in Sons of the Forest. Thank you so much for reading, we hope that this Build Guide was helpful. Looking for more guides for Sons of the Forest? We have many more available on Gamer Journalist, so feel free to check them out if you are interested in seeing more from us.


Published: Mar 16, 2023 06:00 am