The new Animal Crossing New Horizons update brings tons of new content to the game, including crop farming and cooking! There are five new crops available as of the Animal Crossing New Horizons 2.0 Update. In this guide, we’ll show you how to grow crops in Animal Crossing New Horizons, including how the four-day life cycle and yield works.
How to get crops in Animal Crossing New Horizons
There are two ways to get started growing crops. First, you can talk to Leif at Harv’s Island or the Resident Services area. Every week, Leif will have a set of seeds and starts you can purchase. The inventory rotates week by week, so you will need to wait a couple of weeks to get all five starts and seeds for the new crops.
Here are all of the newly available crops:
- Carrot start
- Seed potato
- Sugarcane start
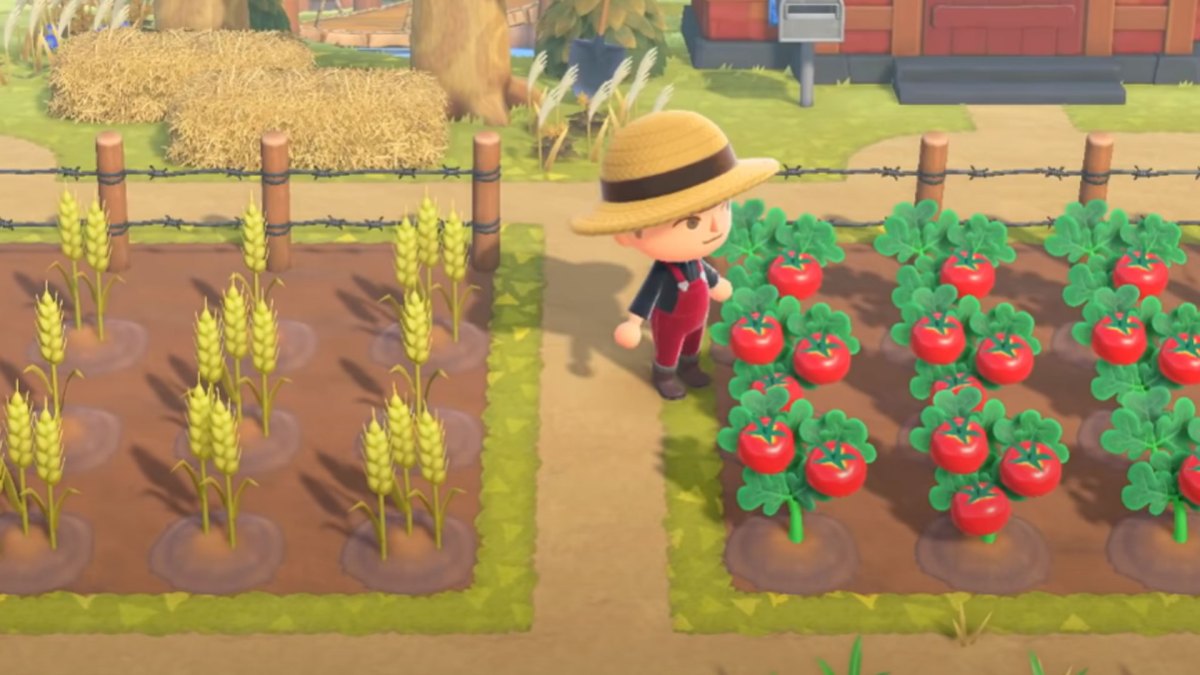
- Tomato start
- Wheat start
The inventory resets every Monday, so you can check back then and pick up any items you’re missing. It is random, though, so you may see some duplicates every week. You can also head on over to Kapp’n’s island. There’s a chance to pick up some of the crops randomly at that location, as well. You’ll need to use some Nook Miles, though, so it’s up to you which method you want to use to get your starts.
When you have the crop seeds and starts in your inventory, you can begin digging and planting them on your island.
Animal Crossing New Horizons life cycles of crops
The crops have a four-day cycle, meaning they grow each day. Here’s what the life cycle looks like for these crops:
- Day 1 – Small sprout
- Day 2 – Medium sprout
- Day 3 – Large Sprout
- Day 4 – Ripe plant
In other words, if you plant a Wheat start and dig it up on day one, you will receive a Small Wheat Sprout. On day two, you’d receive a medium sprout, and so on, until day four where the plant fully ripens.
Crops also do not rot, which means you don’t have to worry about planting them in a particular season. You can also leave the items on the ground without worrying about them turning bad over time and attracting insects.
Animal Crossing New Horizons crop yields
You can influence the yield of each crop by watering it a certain number of times. Here’s how to influence the crop yield:
- 1 Crop – do not water.
- 2 Crops – water the crops once.
- 3 Crops – water the crops twice.
To explain this further, if you want a single potato, you would plant the seed potato and allow it to grow for four days without watering it, yielding one potato. Watering it once will net you two potatoes, and watering it twice will yield three.
You can tell if a crop has been watered once by seeing if it’s shiny or not. A crop that has been watered will show a sparkling animation on it. So pull out any watering can and have a look at your crops. Of course, you’ll likely want to always water your crops twice for the maximum yield.
How to get more crops in Animal Crossing New Horizons
To plant more crops, you don’t need to worry about picking up any more seeds. You can simply use any of your grown crops, like a Tomato, dig a hole, and throw it in there. Tap on the item and choose the “Plant 1” option. The newly planted crop will begin growing at the beginning of the life cycle (small Tomato sprout).
After planting the Tomato, you can go through the four-day process to grow a fully ripened Tomato. Remember, you can plant these at any time during the year, even in Winter!
What do you need crops for in Animal Crossing New Horizons?
Alright, so you know how to grow some crops year-round, but what purpose do they serve? Crops are used in cooking recipes in Animal Crossing New Horizons.
You can start cooking by heading over to Resident Services and buying the Cooking DIY pack. After picking that up, you will see DIY Recipes+ with a whisk icon, letting you know you have access to cooking. You’ll find the cooking tab on the right side of the DIY Recipes menu—Sweet and Savory.
- Sweet: Pancakes and Orange smoothie
- Savory: Flour, Sugar, Carrot potage, Pumpkin bagel sandwich, Tomato curry, Grilled sea bass with herbs
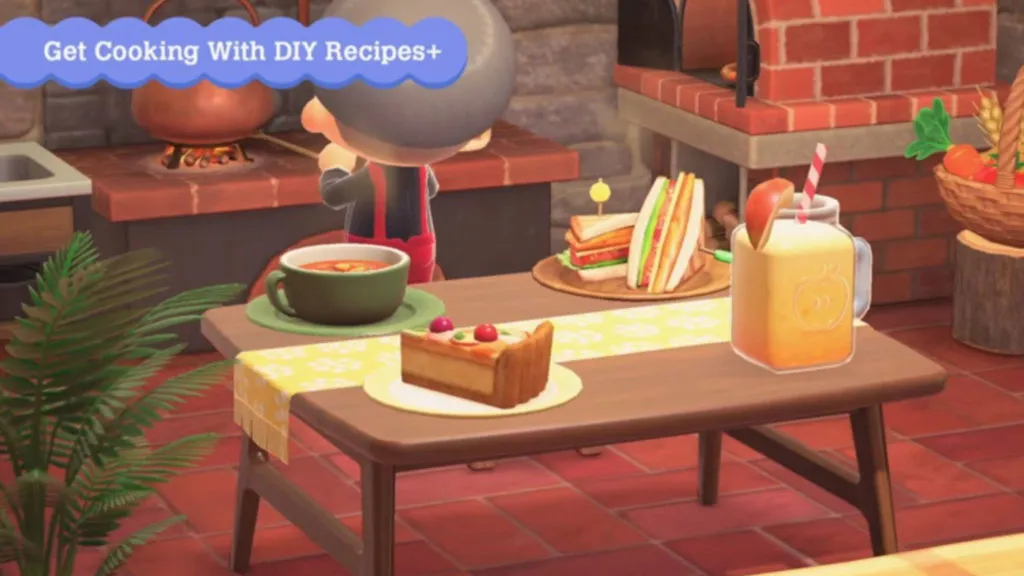
You’ll notice some of these recipes require the crops you now know how to grow! You can get new recipes at Nook’s Cranny and pick up the Basic Cooking Recipes for around 5,000 Bells. Purchasing the new recipes allows you to cook some awesome new items and your first DIY Kitchen.
Now you know how to grow crops in Animal Crossing New Horizons so you can begin your journey to becoming a master chef.


Published: Nov 4, 2021 07:11 pm