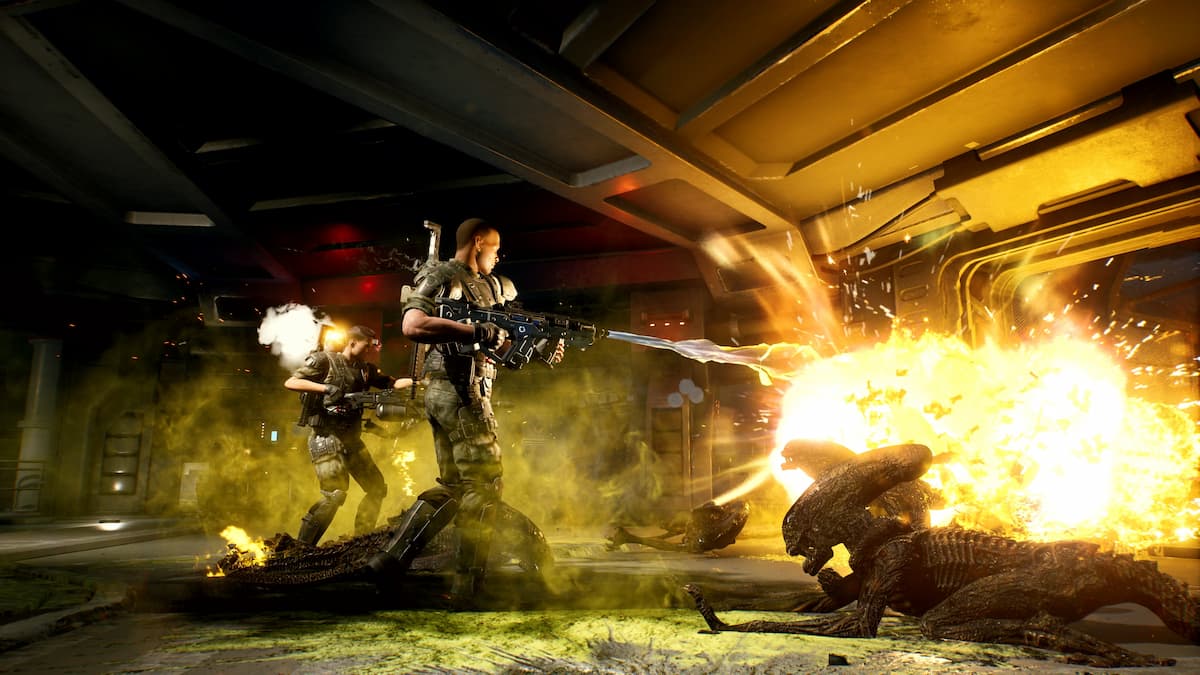
If you’re one of those players who likes to complete all the achievements in the game, then you’ll definitely want to find all 39 intel locations in Aliens Fireteam Elite. If you are playing the game on PlayStation, you will get the CMISRS Asset Trophy for finding all the intel, or the CMISRS Asset achievement if you’re an Xbox player.
When you find the locations of the intel, you will need to talk to an NPC, who will explain their subject. After that, you can read the intel in the Inventory menu whenever you want. Note that finding the intel locations is not mandatory to finish the missions and that it will take time to find them all.
Related: Is Aliens: Fireteam Elite Cross-Platform/Crossplay?
Intel Locations Aliens Fireteam Elite
UAS Endeavor Intel Locations (3)
First, exit the armory and take the stairs on your right. Go through the first door, and after you go through the second, immediately turn left. There’s a poster on the wall called U.A.S Endeavor Plaque, and when you interact with it, that’s your first intel location.
Return to the armory and turn left after you exit. Proceed forward and check your right side to find a crate with the sign “Fulminum Alloy Powder.” Interact with it, and that’ll be your second intel location.
After you find the second intel, proceed forward and turn right when you reach the stairs blocked by a yellow gate. After that, turn left before you stumble upon the orange crate, where you will find Battle Streamers on the floor. Interact with them in order to find the third intel.
Fireteam Elite Priority One Intel Locations (9)
Ingress (3)
Before you reach Hoenikker’s PDA, you will find a Xenomorph. Turn around, continue down the corridor, and then turn left in order to find the Katanga Flight Recorder.
Just before having to defend your positions from the Xenomorphs and running the Startup-Sequence, go left, take the stairs down, and continue down the left corridor. On your left side and behind a crate, you will find a Dead Facehugger. Interact with it.
After you talk to Esther for the first time, you will find a room with red pipes. On the table in that room, next to a computer, you will find the Colonial Indenture Contract which is the final intel location in this mission.
Rescue (3)
When you start this mission, go through the door and then enter the room on the left. There, on the table, you will find the Eye on Seegson Magazine.
After you go down a long set of stairs, find a room on the right. In the room, you’ll discover a Prowler and in the right corner, there will be a Liquid Replenishment Latex.
The final intel location here is to be found in near proximity to the place where you override the core and see Monica. Proceed through the door from the direction of the console. Go left just before the stairs and go to the back of the room where on a workbench, you will see The Working Joe.
Extraction (3)
After you walk out of the elevator, go around it. There, you will find Hoenikker’s ID Badge lying on the floor.
When you exit the sewers, after a while, you’ll reach a long corridor. Check the wall to find the Beltway sign written on it. Go down the stairs, and on the opposite side of the wall where you found a sign, you’ll discover the Cargo Manifest.
The last intel location is near the large ship you defend. Before the entrance to the ship turn left, and proceed until you reach the stairs. When you climb them, go right, and on a crate, you will find the Crooked Rook’s Cap.
Fireteam Elite Giants in the Earth Intel Locations (9)
Insertion (3)
After the start of the mission, go down the stairs. While searching in the cave for a white and blue tent on the right side, you will fight a set of bugs. Inside the tent, you’ll find an Empty Can of Aspen Beer.
While walking through the area with rocks across the water, go to the end of the lower level. Turn right, and on the top of the crates, you will see the Colonial Protection Act Pamphlet. Interact with it.
The final intel location in this mission is near the end of the bridge outside. Go left and continue to the place where there are a couple of trucks nearby. Pass the destroyed android, and on a table, you’ll find the Frontier Pilot’s Cowboy Hat.
Contact (3)
Soon after you start the mission, you will reach a room with a big stone head. Go towards its face, and on a crate, you’ll locate the CMISRS datapad.
When you reach the stairs leading to a room with a stone sphere in the middle, turn right and approach the white Weyland-Yutani containers. On one of the containers, there will be The Frontier War item. Pick it up in order to gather intel.
On the place where you fight Sniper Synths in this mission, there will be a large statue. Follow the path left behind the statue and pick up the Weyland-Yutani Ball Cap.
Evacuate (3)
Locate the room where you will be attacked by waves of synths. There, on a white workbench, you will find Hoenikker’s Signed NDA. It is located under ammo crates and medkits.
In a room with Working Joes, go up the stairs on the left side. Turn left, and on the top of a Weyland-Yutani crate, you’ll find Rodriguez’s ID Badge.
The final part of the mission includes a fight against SN/TH/YA’s androids, where a sniper will shoot from a platform on the left. Underneath that platform on a Server Panel, you will find the third intel.
Fireteam Elite The Gift of Fire Intel Locations (9)
Recon (3)
After you start the mission, near the base of the stone statue, there will be a laptop with detailed 40th Marine Expeditionary Unit’s adventures.
The second intel is in the room with stone pillars. Go towards the round door on the right, and on a crate, you will find an Issue of Unexplained Universe.
While moving to the final scanning objective, you’ll see a big stone head. On its right side, there will be pillars with an Empty Pathogen Ampule you need to interact with.
Advance (3)
In order to find the first intel, listen to Esther talking about a living battery. Towards the room’s exit, you have to climb the ledge on the left side and pick up the Scientists Notes With Glyphs.
Interact and defend the second Instrumentality. After the fight, enter the next room and turn right. Climb to the platform, and on a desk with a monitor on it, you will find the Gateway Station.
Pay extra attention to the next intel location since it’s a little complicated to find it. Go back from the location where you found the Gateway Station, turn right, and then left in order to reach the room with a circular path. Follow that path to the right, and you’ll see a room with an open door. On the left side of the room, right next to a wall, you’ll find the Dead “Popper.”
Boarding (3)
After you pass the ship hologram, enter the next room. There, you will find two Engineer consoles with three seats. Pick up a Strange Helmet from one of the seats in the two consoles.
When you defeat the enemy in the next room, reach the ramp and turn left. Behind the Engineer console, you will find a Severed “Stalker” Tentacle.
The final intel location in this level is in the room with a pilot’s seat. When you come near it, DON’T CLIMB THE STAIRS, but instead, turn left, where you’ll find the Control Flute on a table.
The Only Way to Be Sure Intel Locations (9)
Breach (3)
Follow the mission objectives until you reach a room with two turrets that are defending the corridors. Jump over the yellow obstacle and take the first right. On the right side, there will be the Armat Weapons Case waiting for you.
After that, continue until you reach an open room. In the room, you’ll see a yellow crane on the left side and stairs you need to climb. After the stairs, turn right and then left shortly after. Pick up the UA Centennial Poster.
When you reach the entrance to the hive, go right. Near the door with the Deck 28 sign, interact with Acid Burster Goo, and that is the third intel location in this part of the mission.
Rescue (3)
Follow the quest marker to get to the blood trail, which leads to a door on your right. DON’T GO THROUGH THAT DOOR. Instead, go forward, turn left, and from a nearby crate, pick up the Partially Dissolved Helmet.
Near the bottom of a large staircase, look left, and you will find a Hyperdine Weapons Catalog. Interact with it in order to gather intel.
After you find the second one, walk further until you reach a room with catwalks. There, you will fight a praetorian. Turn right on the catwalk and then keep going forward. Take the stairs down, and there will be the Union of Progressive People laptop on top of the two barrels.
Regicide (3)
After you defend the first console, run past it, turn right, climb up the two sets of stairs, and pick up the Drone Shedding to your right. That’s the first intel location in the final mission.
Herrera will describe to you a room that is like a maze. Once you reach that room, stay on the left side of it, and near the wall and on crates, you’ll find the Three World Empire item.
For the final intel, you will find out that you first need to repair the elevator in order to escape. After you do that, you will stumble upon a room with the corpse of a Marine. Pass it, stay on the left side of the room, and after continuing straight, you will spot Corporal Shipp’s Dog Tags on a crate. Interact with it, and you have officially found all of the intel.
We hope you found our guide useful. For more similar content on Gamer Journalist, see Is Aliens: Fireteam Elite Co-Op Multiplayer? or All Steam Deck Verified Games.







Published: Nov 13, 2023 09:27 am