After returning to the transformed, dust covered Earth, you will need to face the elements and perhaps come face-to-face to the unforgiving viruses. Everything you knew about Earth is long gone, being the intergalactic Marco Polo of the New Earth. Players will need to get to grips will the way the world works by gathering resources, scavenging loot and upgrading your base. The uncovering of the secrets on how Earth fell to mother nature can lead you down a dark path with sickness around every corner. This is Vincent’s guide on how to use the Virus Analyzer in Forever Skies.
How to Get the Virus Analyzer in Forever Skies
The Virus Analyzer is a crucial piece of equipment that you will need in Forever Skies. As you can quite easily succumb to the effects of the viruses in Forever Skies, you will need to learn what is best to avoid contact with/ how to cure yourself of these illnesses. The three viruses you can get in Forever Skies are:
- Fever – Increased dehydration, decreased stamina with double vision problems.
- Photophobia – Sensitivity to sunlight causes damage to your eyes and visual problems.
- Vertigo Virus – Hallucinations and weaker immune system making you susceptible to internal problems.
Related: Where to Find Medium Oxygen Tank in Forever Skies.
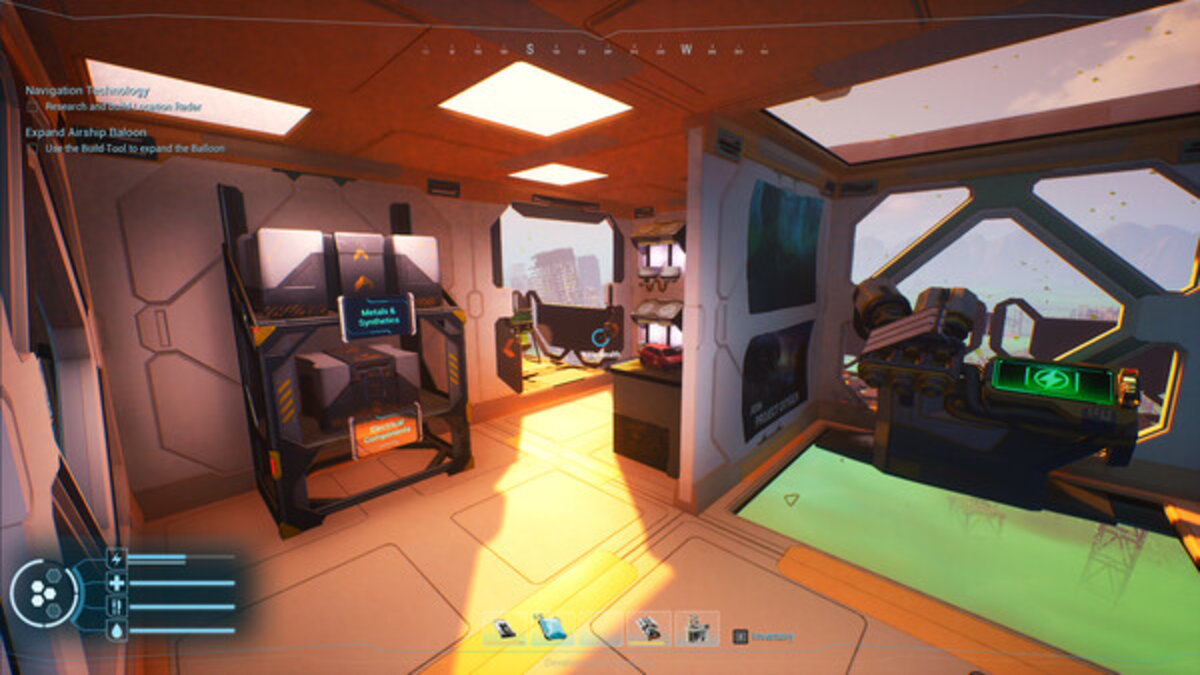
The Analyzer can be found through following the Main Missions where your first endeavour into the Underdust will result in locating the forgotten Virus Analyzer. You need to interact with it for scanning, gaining knowledge on how to build it at your base. The Analyzer is located in the Laboratory in which you should scan the Carrier for a Blueprint on how to build it. From the base, go forward and turn left. Go up the yellow ladder and use the Extractor on the gold pixelated walls. The Extractor should be used against walls that are coated in gold and have a sweeping pixelated sheen that appears consistently. Go across the wooden beam and grab the Crystal Battery located on your right. Then go left, climbing up to the next level via the rubble on your left. Follow the path upwards, placing the Crystal Battery in place on the wall as you head up. You can refill on oxygen here.
Keep heading up until you find another ladder to climb. Before you climb up the second ladder, search the area for another Crystal Battery which can be placed in the oxygen stand on this level. There is the New Life Forms and Virus Sample Analyzer that you should scan for research back at your base.
Built and Ready – How to Use the Virus Analyzer
Once the Analyzer is built in your base, you can use it to analyse any viruses you come across during your playthrough. As of right now, there are three viruses to study but this can change due to its Early Access form. In order to analyse, players need to get a sample of the virus and place it into the Analyzer. Samples you need for each virus are:
- Fever – Impious Mantis
- Photophobia – Sunmelon
- Vertigo Virus – Lulling Grass Cricket and Dust Daisy
Whilst each virus has its own cure:
- Fever – Green Colander (Raw or Boiled) and Petit Astre (Raw or Boiled).
- Photophobia – Dust Moth (Raw, Fat or Boiled) and Dust Lettuce (Raw or Boiled).
- Vertigo Virus – Patat (Raw or Boiled) and Boiled Meteor Bean.
You will want to analyse the Virus Samples you have found listed above through the Analyzer. To use the Analyzer, interact and open the Analysing Menu and select the Sample you wish to analyse. This will open the Virus Extractor Screen in which you will see the specific virus strand you need to look for in the petri dish underneath the Extraction Process Bar. You need to input the data of the virus strand offered on this bar into the steps on the left-hand side to remove all other particles in the dish. You should not input what is directly written for the virus you are looking for as that will remove the virus. Instead, you should hover over each option in the step, avoiding what is written for the virus and select the particles to remove that is not the same icon as the virus itself. Each option you hover over will highlight in a white outline for its removal.
What you will have left after the 3 steps is a single virus strand of the specific virus you want to research. As you only have 3 attempts to remove all strands aside from the one that you need, you can easily mess the process up which destroys the Sample. Therefore, pay close attention to what is written about the virus and use that to remove the particles that are not needed. With the virus being the last one standing, the Virus Sample will be extracted.
We hope this Forever Skies guide was helpful. Looking for more on the latest gaming content? Be sure to see all GJ related articles written by the team here. Thank you for reading this guide.


Published: Jun 27, 2023 05:40 am