Minecraft is a game about mining and crafting, but also about advancement and evolution. If you’ve had enough of caving and risking your life for iron, then you can simply automate the process. Iron farms are efficient and will generate iron whilst you are away. Soon, you’ll so much iron you’ll be making iron blocks just to store them. Here is how to make an iron farm in Minecraft.
Building an Iron Farm in Minecraft
Making the chamber
Make sure that you have these items to begin. Please note that you may need numerous copies of one item:
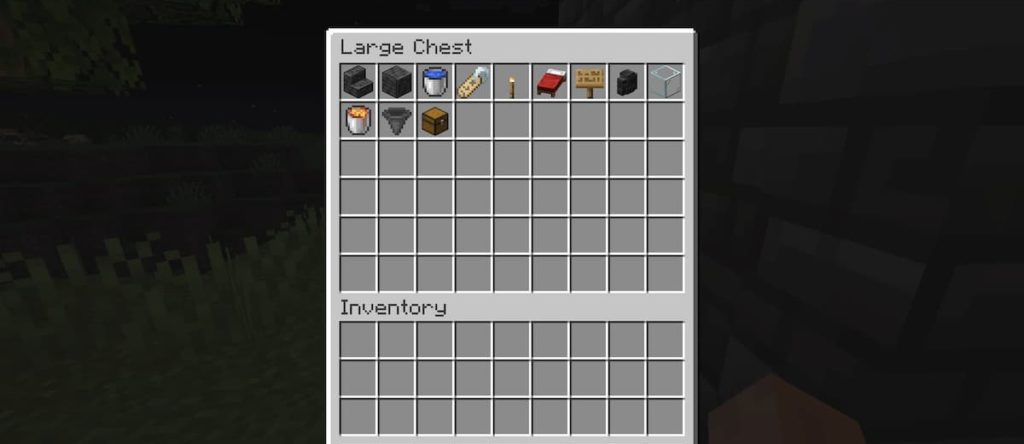
The iron farm works by triggering an iron golem’s spawn requirements. We will force the iron golem to spawn in a current that will throw it to its demise, producing us free iron.
One of the iron golem’s spawning triggers is when three villagers are panicked about a threat. So first things first, we will construct a chamber to perpetually panic three villagers. The chamber will be build at least 12 feet off the ground to stop the golems from spawning on the floor.
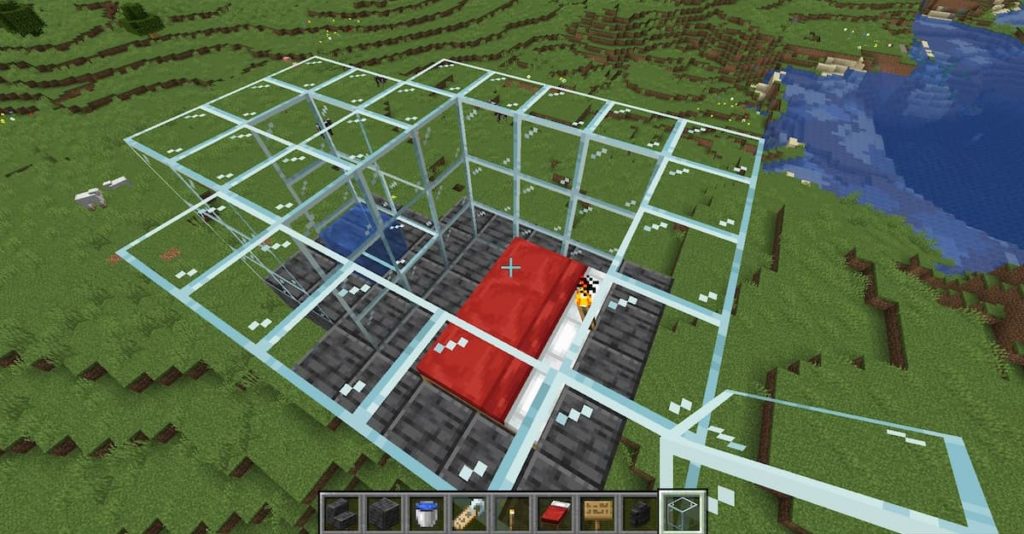
FIrstly, use your building blocks to create a five by five platform of a fireproof block of your choice. Use glass (or any other building block) to build up the walls. You must make the walls three blocks high. Place three beds at one end of the chamber and place a torch to prevent mob spawns. This is the chamber that the villagers will stay in.
On one side, opposite the beds, add a two by three small platform and build walls the same as the other chamber. Break the middle block separating the two chambers. Place the water bucket at the bottom. This will be the chamber the zombie will go into. The broken block will allow the zombie to trigger the villager’s panic mode.
It should look like this:
Populating the chambers
Now that the chambers are ready, create a stairway up to the chamber to allow mobs to follow you. Find a zombie and allow it to follow you upstairs. Block off the primary chamber so it doesn’t fall in. When it falls into its hole, use a nametag to name it. This will keep the zombie there indefinitely.
Next, use boats or workstations to lure the three villagers into their chamber. Block off the zombie’s chamber completely with dirt as you do this. Wait for the green sparkles to indicate that they are happy with their beds, and break the dirt blocks.
Creating the golem’s spawning platform
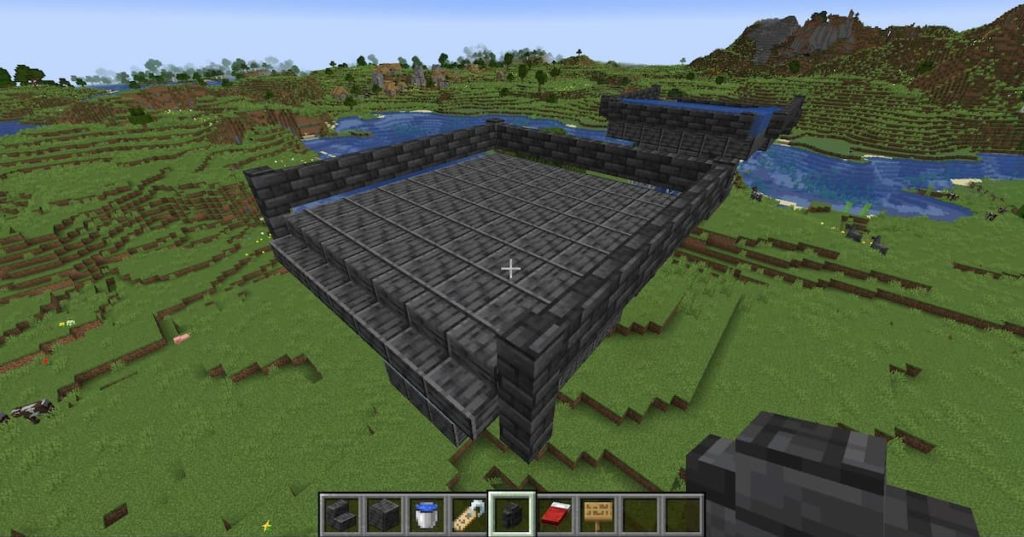
Now we will be constructing the platform atop the chambers to provoke the spawn of golems. On top of the chamber, build a 7 x 7 platform and fill it in. Place stairs fully along one of the sides. Then place walls around the platform, but do not let them connect to the platform. Do not place walls along the side with stairs on it. Note how the walls are actually one block away diagonally from the platform. It should look something like this:
Now, along the side with the stairs, create a second 3 x 7 platform coming down from the stairs. Place three stair blocks at one of the ends, but push them into the platform. Again, use walls to contain this platform without actually touching the platform.
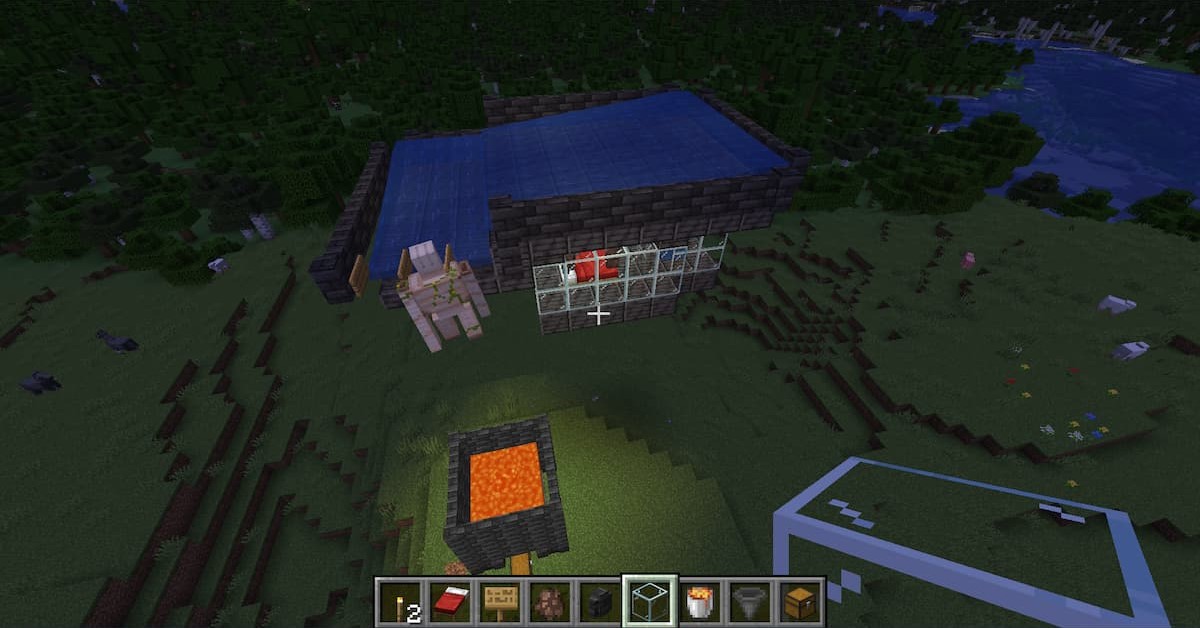
Now, use signs on the three stairs to block off the water you will be placing. Place three water buckets at the other end of the small platform and seven water buckets at the very end of the large platform. It should look like this:
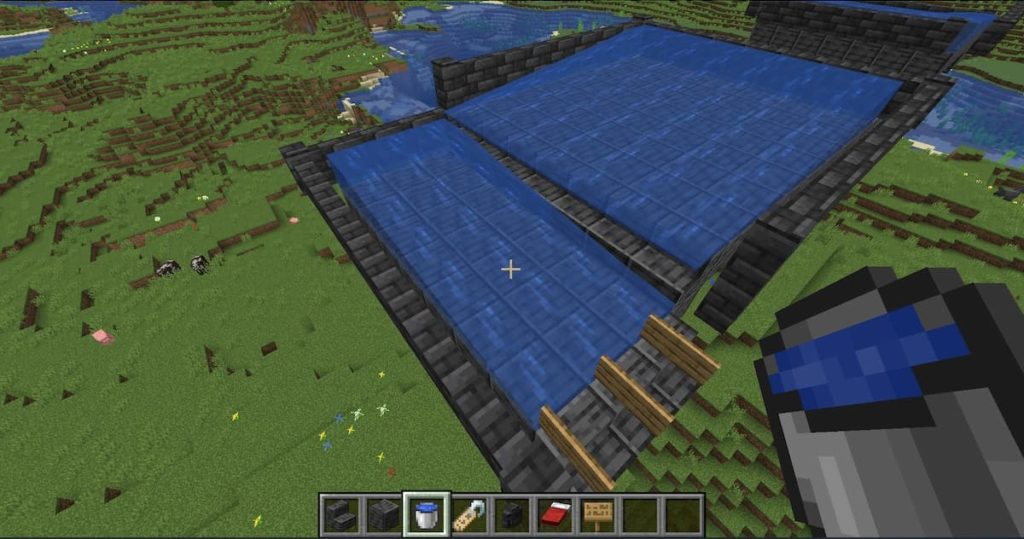
Iron golems will now spawn atop the platform and be drifted down and out of the structure, falling down. All we need now is to construct a lava chamber to catch and slaughter the iron golems.
Constructing the lava chamber
The final step of the plan is the lava chamber. Using blocks, find out the exact centre of where the golems will fall from making a line of the centre of the three stairs to the floor. With the centre found, place a chest one block away. Destroy the blocks you just used. Using hoppers, create a 3 x 3 space, all connecting to the chest. Use walls to surround and block this foundation off.
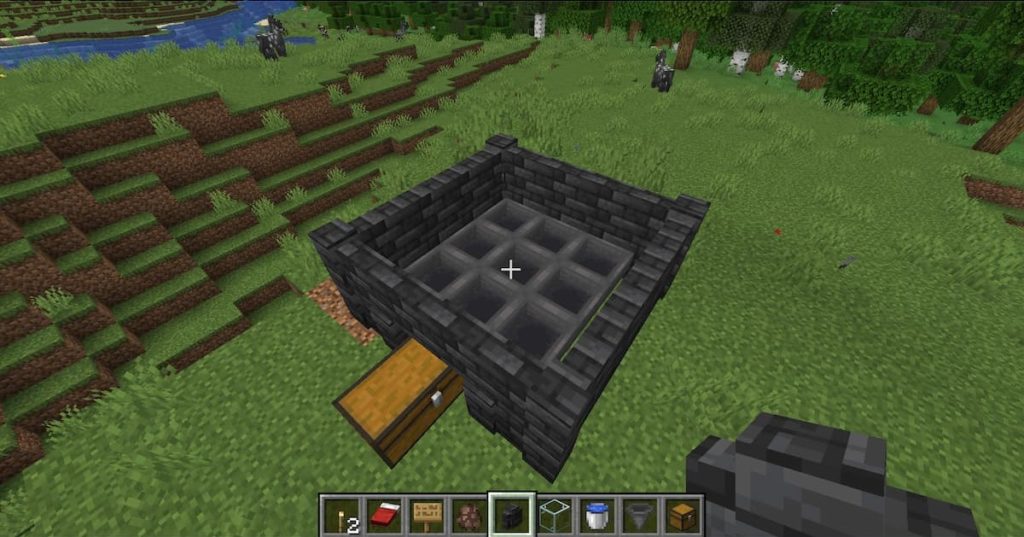
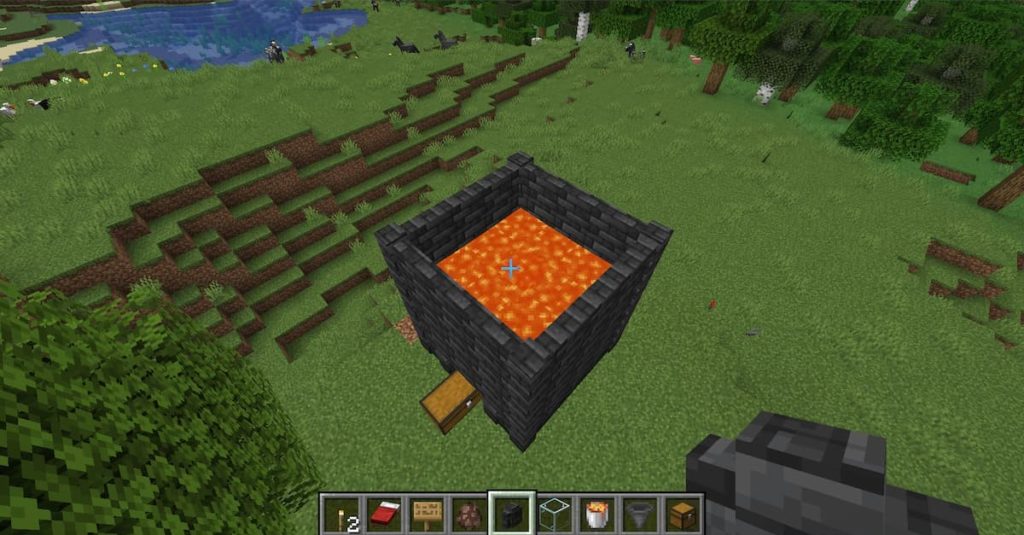
Build up the walls up to six layers. On the third layer, place signs on the walls and on the signs to have signs covering the nine blocks of that layer. This will block all lava. On the next layer, place four lava buckets on each corner.
Now, as the golems fall, they will burn from the lava and all their loot will drop into the hoppers to be delivered to the chest.
Keep an eye on Gamer Journalist for more gaming and Minecraft content, such as how to find a Woodland Mansion.








Published: Oct 11, 2022 01:16 pm