Minecraft is a relaxing game where players can become anything they could ever want to. And with the addition of bees, players can now become beekeepers. If you’ve ever wanted to replicate your beekeeping fantasies in video game format, then Minecraft has you covered. Here is how to make an automatic honey farm in Minecraft.
How to Make an Automatic Honey Farm in Minecraft
Preparing the Hopper System
The automatic honey farm is not as complex as it may seem. To start with, gather these materials in the chest:
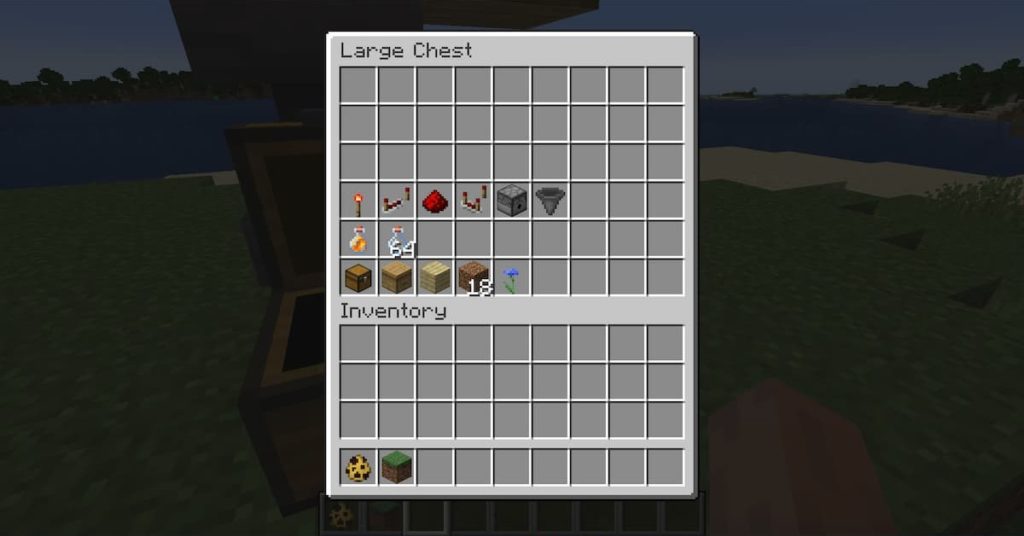
Note that you will need numerous redstone and two compactors and hoppers. Also note that the farm is automatic but you will need to restock the glasses once they have depleted, so it will only run for a certain amount of time.
To begin with, select the chest, hoppers, dispenser, and beehive. Place the chest in the place where you want to collect the honey from. Place the first hopper connected to the chest behind it. Then, place a block atop the chest, just temporarily. Place the second hopper on top of the first, but connect it to the block. Then destroy the block. The hopper should be connected to nothing now.
Finally, place the dispenser atop that hopper facing to the right. Place the beehive next to the dispenser. The dispenser’s hole should be pointing directly to the beehive.
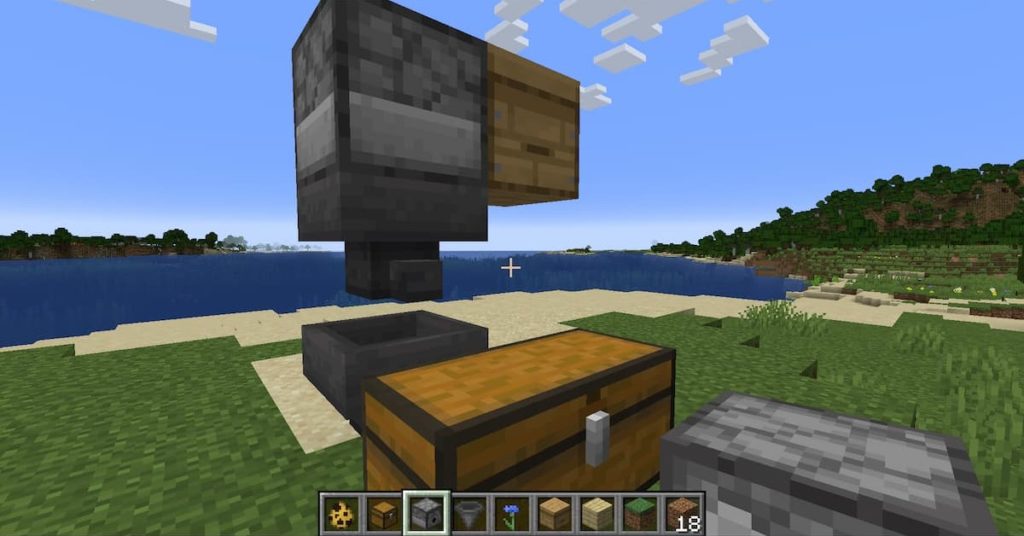
This is the system that will transport honey bottles to the chest, however, now we must set up the dispensers and hoppers.
Interact with the hopper that is connected to nothing, under the dispenser. Place one bottle of honey in the far left slot. Then fill the rest with dirt, or any other building block, with the second and third slot being filled with four dirt blocks, and the last two slots being filled with five. This combination will filter through honey blocks exclusively and lock that filter in place. You must set this up in this order, or it will fall apart.
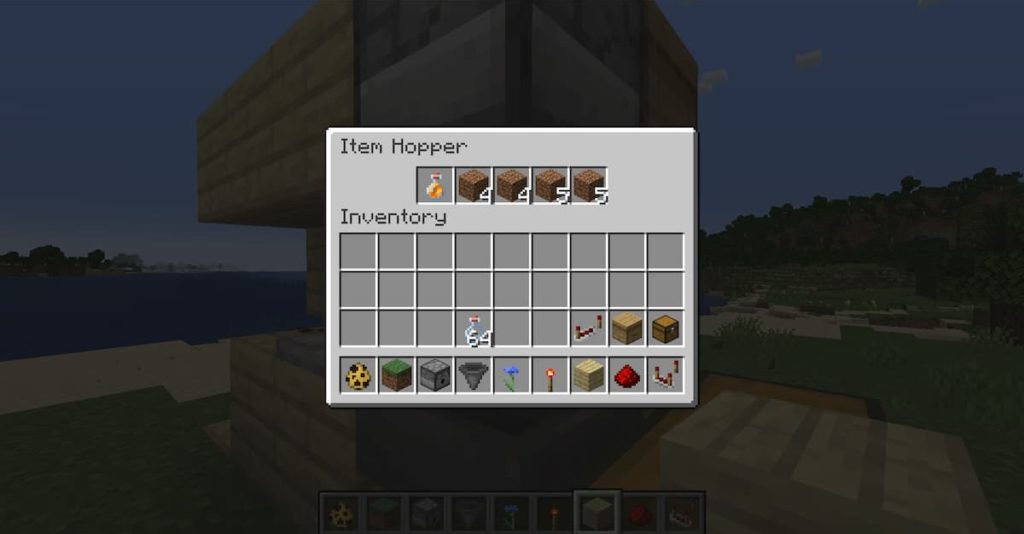
Next, fill the dispenser with as many glass bottles as you want. You can fill up the whole thing with stacks of glass bottles, if you wanted to. The dispenser, when the beehive has honey in it, will use the bottle to harvest the honey. Being the item that the hopper is filtering through, the bottle of honey will sink through the hoppers and into the chest ready for collection.
Note that the first honey bottle that goes through will get stuck in the bottom hopper. This is okay and will allow all other bottles to filter through to the chest.
Now all we need to do is connect the redstone.
Constructing the redstone circuits
There are two circuits that we will be wiring.
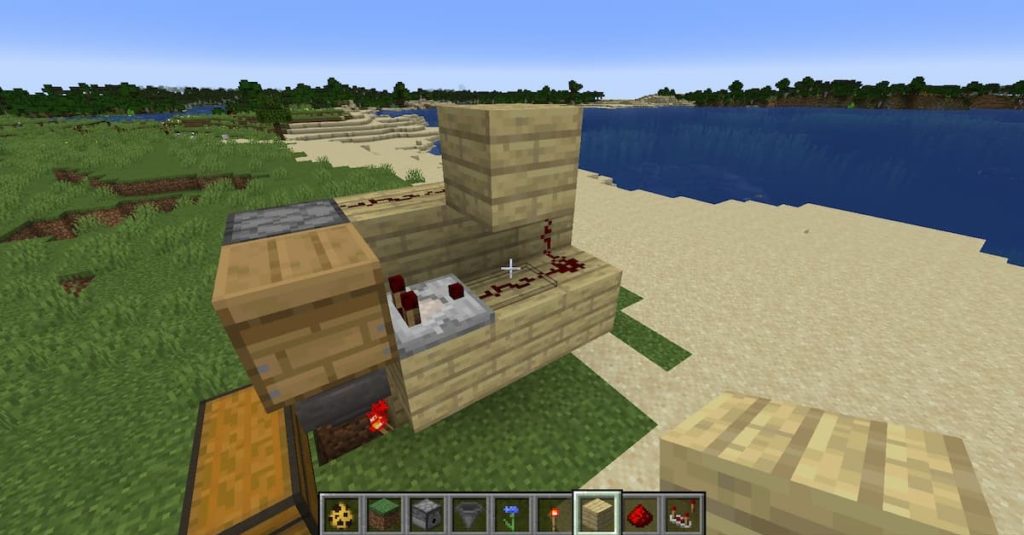
The first one requires one compactor, one repeater, one redstone torch, and two redstone dusts.
Place a block behind the bottom hopper and place a compactor on it facing forwards. Place another block in front of that and place a redstone. Place another redstone in front of that block. Then, break the block under the block with the first redstone on it and place a repeater facing towards the chest.
Finally, place a redstone torch on the face of the block in front of the repeater, right under the bottom hopper. You can then conceal the digging you would have had to do.
It should look like this:
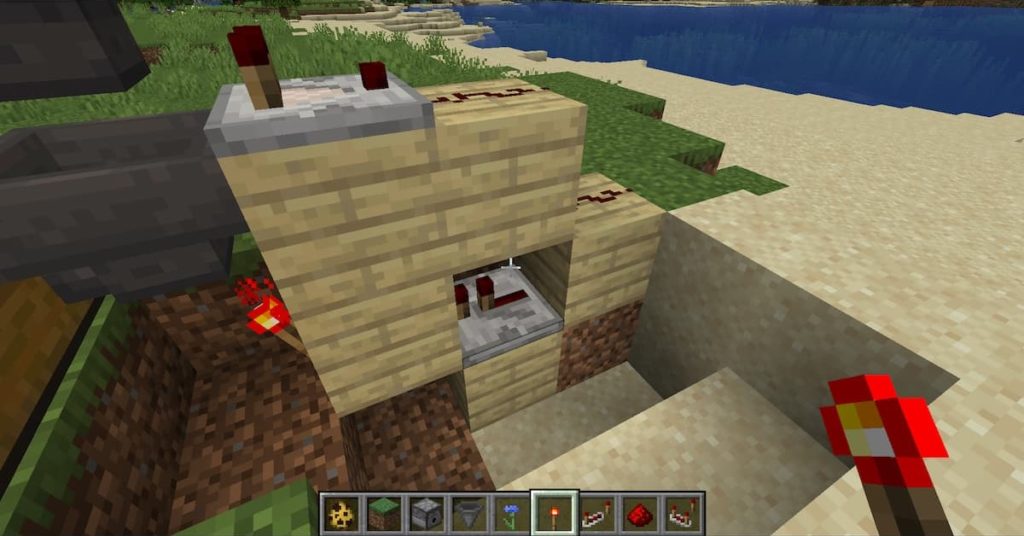
This circuit will activate the hopper systems and allow them to work.
Related: How to get Honeycomb in Minecraft
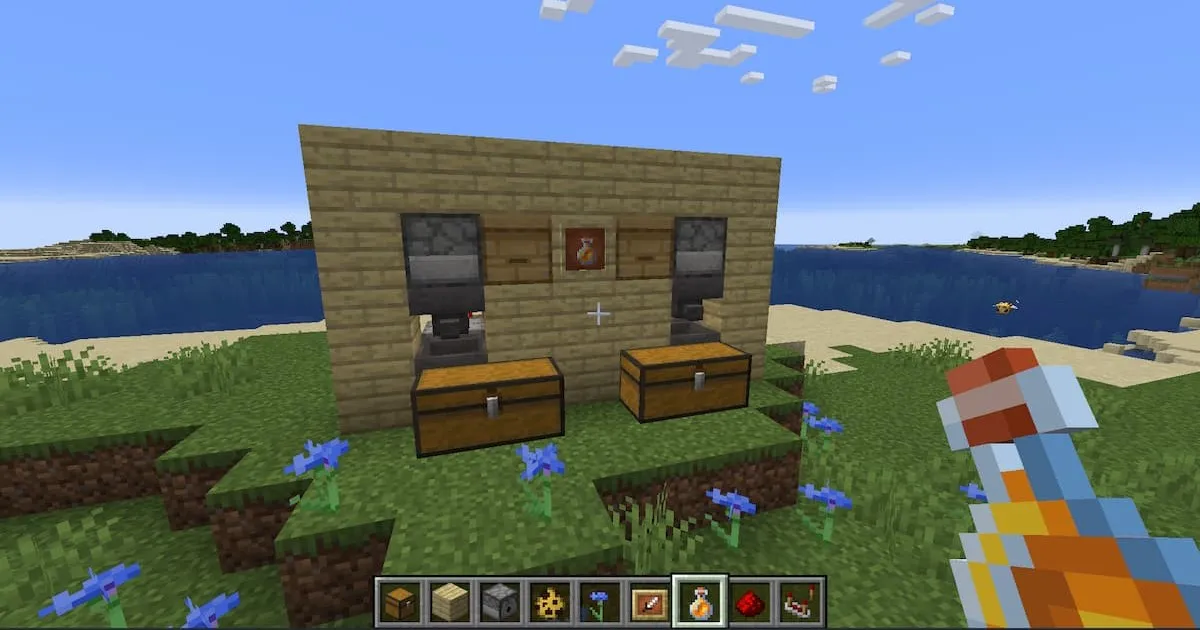
The second system is not nearly as complex. You will need seven blocks, five redstone dusts, and one compactor.
Place three blocks directly behind the dispenser in a line, and place three blocks directly behind the upper hopper in a line. Place the compactor facing away from the beehive directly behind the beehive. Then place the redstone on the surface of all the other blocks.
To separate the redstone lines from each other, place the final block atop the first redstone dust. It should look like this:
This circuit will make sure that the dispenser will activate when the beehive is full.
And with that, you will have completed the automatic honey farm! All that is left now is to attract some bees using flowers and to plant a bunch of them in front of the hives. You’ll be drowning in honey in no time!
Keep an eye on Gamer Journalist for more gaming and Minecraft content, such as how to make a dance floor.





Published: Oct 5, 2022 09:58 am