So the time has finally come for Dreamers to replace the old with the new. As you know, in real life, we frequently get bored with our living quarters and will choose to spruce things up with fresh paint, furniture, or complete renovation! This option has finally made its way to Disney Dreamlight Valley, and now Dreamers can change the appearance of their homes. So, without further ado, follow this guide to find out how to change your House Skin in Disney Dreamlight Valley.
Disney Dreamlight Valley – How to change your House Skin
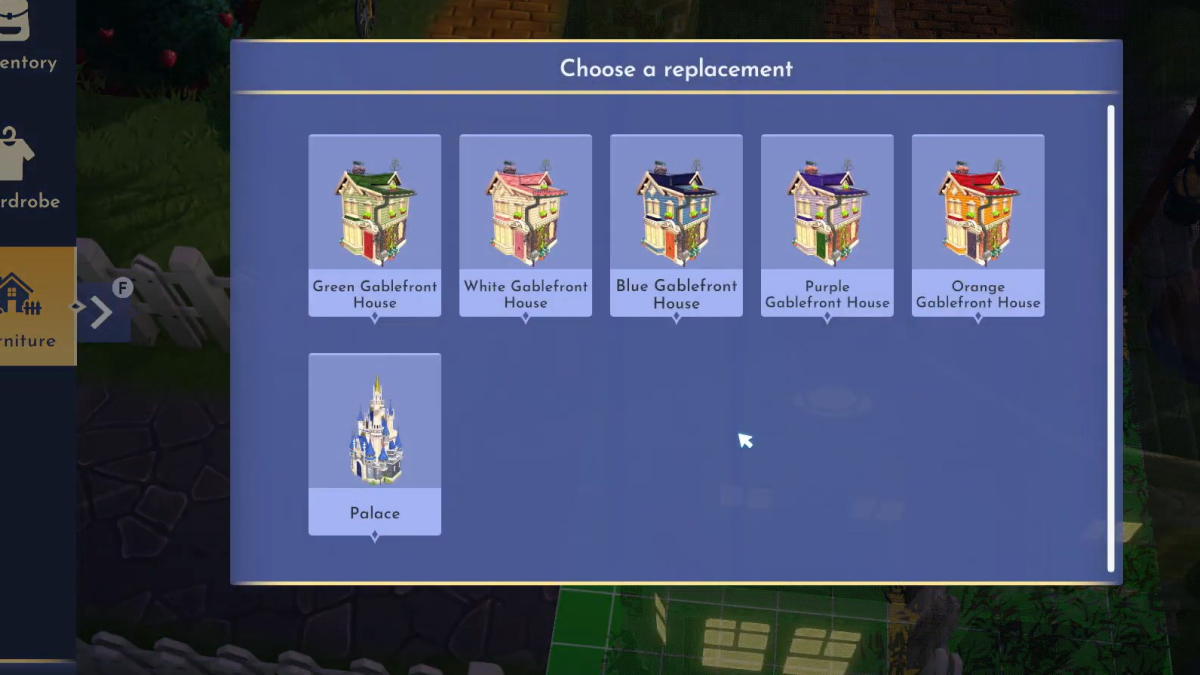
It has been a few months since the previous major update, so it’s not unlikely that Dreamers have been getting a bit jittery about wanting to remodel their homes. To change your House Skin in Disney Dreamlight Valley, go into Funiture Mode; you will then need to click on your House and see green and white gridlines pop up. After that, hit the Replace button, which will allow you to change your House Skin to one of five free skins.
You can now easily change things up; with the third major update, you will receive five varieties of House Skins to choose from. They are as follows below:
- Green Gablefront House
- White Gablefront House
- Blue Gablefront House
- Purple Gablefront House
- Orange Gablefront House
Related: How to Move Woody’s Blanket Fort in Disney Dreamlight Valley
Additionally, you can also buy a new House Skin called the Palace for 3,750 Moonstones in the Item Shop; however, you will only be able to use this skin once you have fully upgraded your House.
And that concludes our guide on how to change your House Skin in Disney Dreamlight Valley! If you’re a new Dreamer, you can check out these guides Disney Dreamlight Valley Codes (February 2023) or Where To Find Blue Marsh Milkweed In Disney Dreamlight Valley. To keep up to date with our content, follow Gamer Journalist on Facebook.








Published: Feb 16, 2023 12:02 pm