While it’s perfectly possible to enjoy the Valheim experience playing solo, it’s definitely one of those games that only gets better with some friends. There are community servers you can join, though that does mean having to share a world seed with a bunch of other people and playing by their rules. You can host a game locally with other people in the same room as you, but due to current world circumstances, that may not be such a good idea. That leaves just one option: dedicated servers! Here’s how you can set up your own dedicated multiplayer server in Valheim.
Dedicated servers are great for folks who want to play Valheim over the internet with their friends, and only their friends. It ensures a completely fresh experience that you and your buddies can journey through together at your own pace without worrying about other players mucking things up in the distance. Setting up a dedicated server isn’t especially difficult, at least compared to some other games, but it will take a bit of tinkering.
How to Set Up a Dedicated Multiplayer Server in Valheim
Let’s take a look at how to get your dedicated Valheim server up and running.
- Download the server utility
Whoever’s hosting the server should open their Steam library and switch to the Tools tab. If you own Valheim, you’ll automatically get the “Valheim Dedicated Server” tool along with it.
If you don’t see the Valheim Dedicated Server tool make sure that you have “Tools” checked on the top dropdown in your Library.
Remember, to host a server, you’ll need enough bandwidth to support more than yourself, so whoever’s got the best connection should be the host. Anyway, download and install that tool.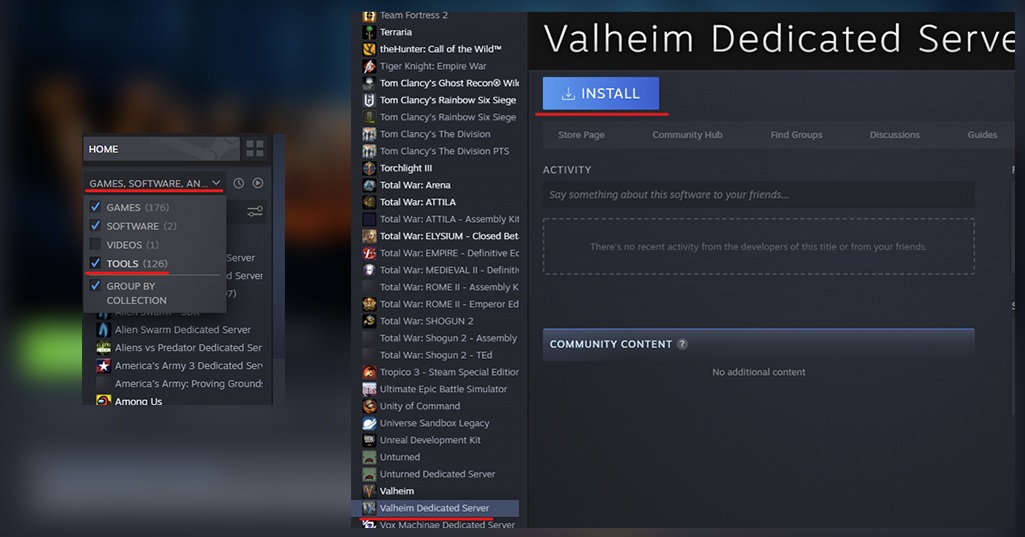
- Backup and Transfer your Game World (Optional)
Before setting up the server it’s a good idea to backup your game world. Also if you are setting up the dedicated multiplayer server on a different computer than the one you’ve been playing on you may want to transfer the world you have already been playing in.
Open your file explorer and navigate to:
%userprofile%\appdata\locallow\IronGate\Valheim\worlds
Copy the files here to a secure location. If you are transferring them, copy them to the same folder location on the new computer.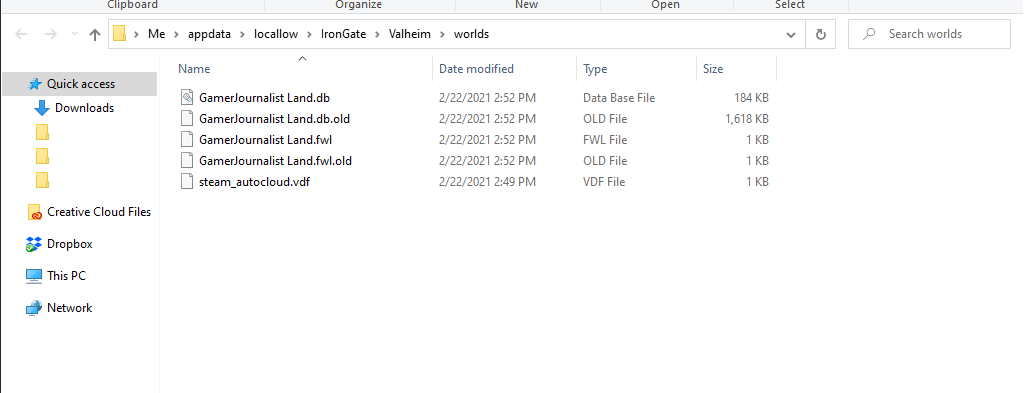
- Open Up Ports
Type your Gateway IP address into your web browser to get your router’s settings (usually 192.168.1.1). Some routers also have phone apps you can do this in. Find “Port Forwarding,” and make sure ports 2456-2458 are being forwarded through your router, as well as your firewall if you have one.
- Configure the Server
Right-click on “Valheim Dedicated Server” in your library and go to Properties. On the right go to Local Files and Browse. Go to the “start_headless_server” file, right-click it, and click “Edit.” From the file line that starts with “valheim_server,” make the following changes:
-name “My server”: Change the text in the quotes to name your server.
-port 2456: Use the same four-digit port forwarding number that you opened on your router.
-world “dedicated”: Name your world. Don’t use the same name as the server itself, or things could go weird.
-password “secret”: Set your server’s password, and don’t make it the name of the server or the name of the world.
-public 1: If you leave this option as “1,” your server will show up in the community server list. If you change it to “0,” it won’t.
Save a copy of this batch file locally so you have a copy in case Steam overwrites it.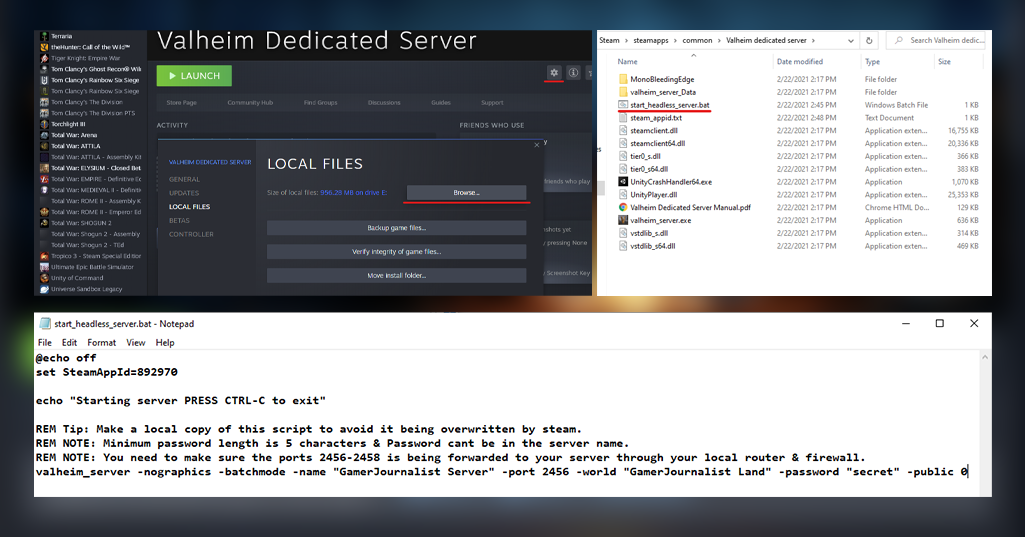
- Launch It
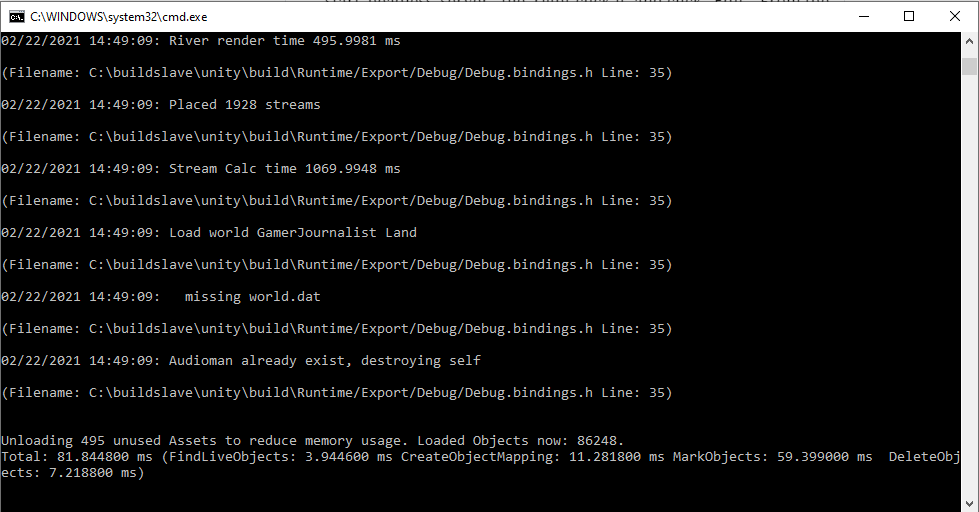
You’re all set! Launch the Valheim Dedicated Server tool. You should get a command prompt, and after a moment, you should see “Game Server Connected.” Your server is now live and should appear on the community list in a few minutes (if you set public to 1), where players with the password can join. The server will run in a command prompt which you can close anytime to shut the server down. Remember to run the tool again whenever you want to bring the server online!
If you set up a private server that won’t show up in the community list. Your friends may need to join the server via an IP address. You will need to give them your external IP address to join. You can get your address by going to WhatIsMyIPAddress and giving them that number.








Published: Feb 22, 2021 08:30 pm