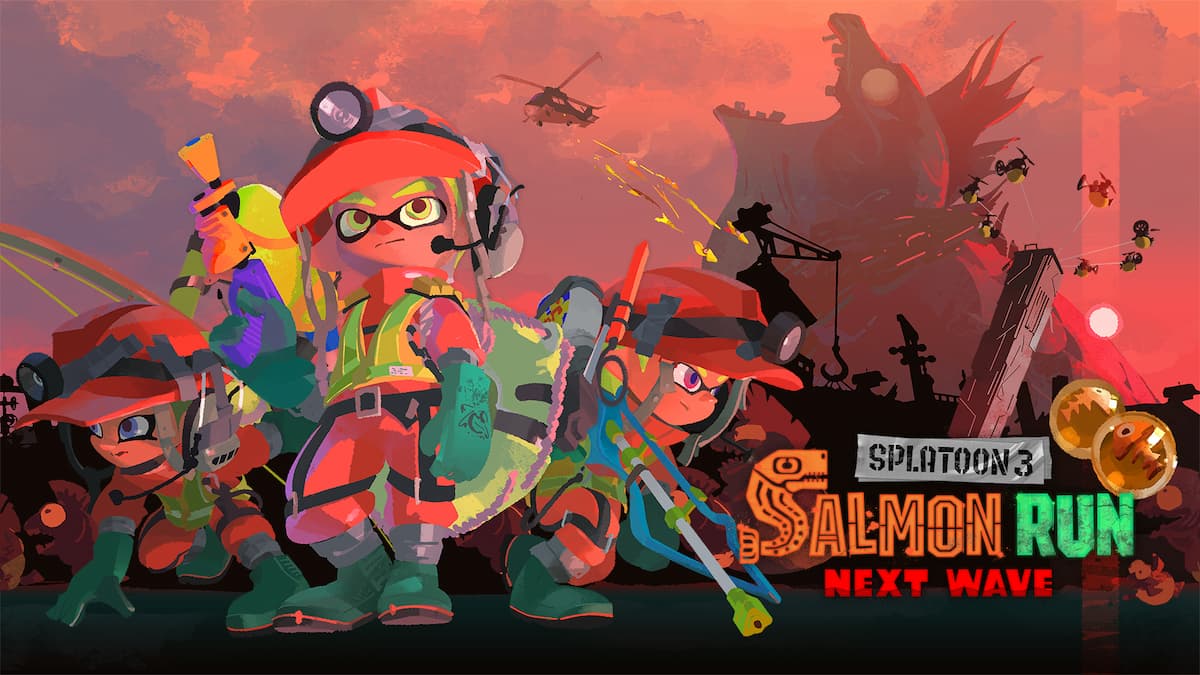
Originally introduced in Splatoon 2 as an alternate game mode from the regular Splat battles, Salmon Run has made a return in Splatoon 3 as Salmon Run Next Wave. It’s a shady, dangerous job, but if you perform well, you’ll make some mad bank, not to mention get a real thrill in the process. Whether you’re a new hire or just need a refresher, here’s how to play Salmon Run in Splatoon 3.
How to Play Salmon Run Splatoon 3: Stages, Bosses and Features
Salmon Run, in a nutshell, is a timed horde battle mode. You and three coworkers are dropped onto a small island, where you’re besieged by ravenous Salmonids. By splatting the larger Boss Salmonids, you receive Golden Eggs to deposit in your basket. If you can get enough Eggs to fill your quota and survive all three waves, you win! Miss your quota or the team gets wiped out, and you lose. That’s the short version, but now let’s get into some specifics.
Basic Mechanics and Teammates
In a Salmon Run shift, your teammates are your lifeline, so make sure to work together! At the start of every wave, you’ll each be randomly assigned a weapon from the current weapon pool, plus two uses of a Special. Once your Specials are used up, you’re not getting any more for the rest of the shift, so think carefully!
When you pick up a Golden Egg dropped by a Boss Salmonid, you need to bring it to the basket and press A to deposit it. If it’s too far to walk in a reasonable time, you can launch the Egg a short distance with A. This takes ink, though, so make sure to keep your tank topped up. Remember, you need to meet the wave’s quota to proceed to the next wave, so check your progress on the top-left of the screen.
If you’re splatted by a Salmonid, you’ll appear in a life preserver. Press up on the D-pad to call for help when you’re like this; if a teammate shoots you with ink, you’ll respawn. If the whole team gets splatted, the shift is officially kaput, and is marked a failure.
Salmonids and Golden Eggs
Salmonids come in 21 different varieties, broken up into Lesser Salmonids, Boss Salmonids, and King Salmonids. The Lesser Salmonids, including Chums, Smallfries, Cohocks, and Chinooks, are there to gang up on you and get in your way. Splatting them only yields regular Power Eggs, which improves your score at the end of a job, but isn’t required.
Related: How to Unlock the Catalog & All Catalog Rewards in Splatoon 3
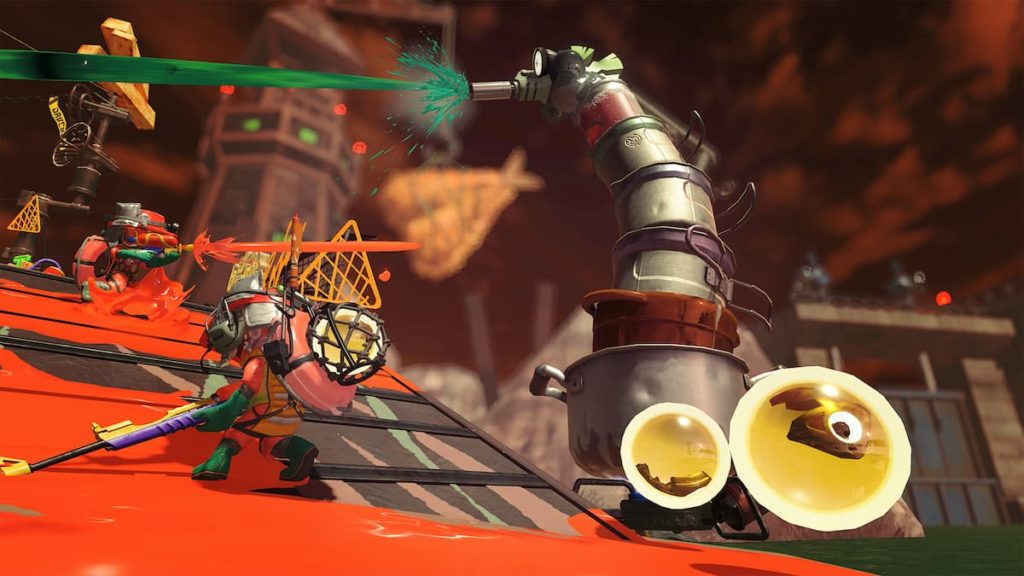
Boss Salmonids are the ones you care about. Splatting a Boss Salmonid yields three Golden Eggs for you and your teammates to bring back to the basket. Whenever a Boss Salmonid appears on the stage, a message reading “Boss Salmonid Alert!” will appear on the top-left of your screen.
Here are all of the Boss Salmonid types and a general overview of their shtick:
- Steelhead: Launches large ink explosives from its head. Shoot the explosive as it inflates to splat it.
- Flyfish: Launches Tenta Missiles from its missile pods. Throw Splat Bombs into its missile pods when they open up.
- Steel Eel: Long machine that slinks around, spraying ink as it goes. Weak point is the pilot on the very back of the machine.
- Maws: Lurks under the ground, then pops up under players to eat them. Drop a Splat Bomb in its warning zone when it’s about to pop up.
- Stinger: Tall sniper that fires a piercing laser from the top. Shoot the body to bring it down to you until you can shoot the sniper.
- Drizzler: Bounces around, launching Ink Storm missiles. Invincible under its umbrella, but vulnerable right after it launches a missile.
- Scrapper: A Chum in a car that’s protected from the front. Shoot the car until it stalls out, then circle around and shoot it in the back.
- Fish Stick: Large stake carried by small, flying Salmonids than rain ink in a circle. Ink the sides of the stake to swim up it, then shoot the Salmonids.
- Flipper-Flopper: Dolphin-like Salmonid that creates a circular target on the ground to dive into. Completely ink the target, and it’ll smash into the ground, destroying its armor and leaving it open.
- Big Shot: Mid-sized Salmonid that places a cannon on the shoreline, then brings shockwave-creating explosives to it from the water. The Salmonid can be splatted normally, and the cannon can be used by players to launch Eggs.
- Slammin’ Lid: Chum piloting a UFO that drops off more Salmonids. If a player moves under it, it’ll attempt to slam down. Jump atop it after it slams to shoot the pilot.
Besides dealing with Boss Salmonids, you’ll also regularly experience “Known Occurrences,” modifiers to the field or enemy behavior that can randomly occur during waves. Some of these even bring out unique Boss Salmonids that don’t show up otherwise.
Here’s the list of Known Occurrences:
- Water Levels: The tide will either rise or recede between waves. You can see the water moving at the start of each wave, though the graphic overlay at the start of the wave will give you a hint as to where the water’s going. Remember, don’t fall in the water!
- Rush: Glowflies appear around the Lesser Salmonids, causing them to rush at you with extra ferocity. During this time, the only Boss Salmonids that appear are Goldies, special Bosses that will try to avoid you.
- Fog: Thick fog obscures your vision. Goldies may spawn while the fog is present.
- The Griller: Large flying Bosses called Grillers will be the only Boss type for the wave. Shoot its exposed tail to stun it, then shoot the tails that spin around it to destroy it. Don’t touch its ink, or you’ll be splatted instantly.
- Cohock Charge: Cohocks will be the only Lesser Salmonid, and will charge at you in large numbers.
- Goldie Seeking: Instead of appearing from the water, a Goldie and a group of Lessers will be hidden in Gushers around the map. Shoot the Gushers to hunt down the Goldie!
- The Mothership: A massive Boss, the Mothership, will fly onto the stage as Lessers spawn endlessly from it. Only long-range weapons like Chargers can reach it. Destroy it quickly, or it’ll fly over your basket and start stealing Eggs.
- Mudmouth Eruptions: Special Bosses called Mudmouths will sprout out of the ground and water and spawn Lessers. Throw Bombs into their mouths to make them spit out Golden Eggs. Keep an eye out for Golden Mudmouths!
- Giant Tornado: A gigantic torando will appear off the coast and begin flinging Salmonids and crates of Golden Eggs at you.
King Salmonids and the Xtrawave
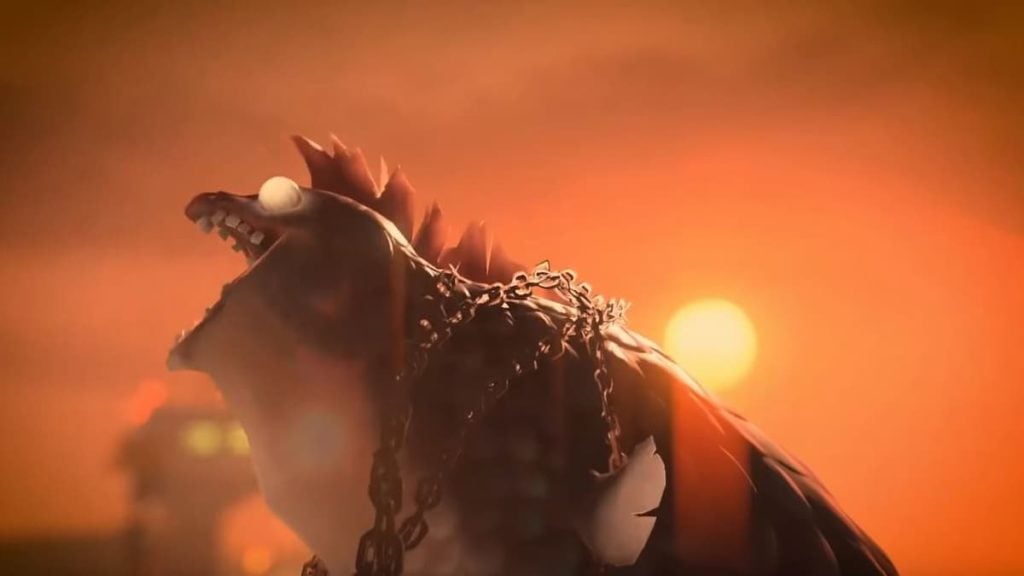
Whenever you finish a Salmon Run shift, you’ll notice a meter on the top-right of your screen in the GrizzCo lobby. That’s the Salmometer, and it fills up as you successfully complete shifts. When it’s full, an Xtrawave has a chance to occur at the end of your next shift.
During an Xtrawave, a gigantic King Salmonid will attack for a limited time. During this time, you’ll be loaned an Egg Launcher to shoot eggs from the regular Bosses at the King. As you whittle down its health, you’ll earn Fish Scales, which we’ll get into in a moment.
If time runs out or the team gets wiped, you’ll still get to keep any Fish Scales you earned, and the shift will still be treated as a success. The Xtrawave is just a time to make some extra bank.
Stage Rotation
Much like Turf War and Anarchy Battle, Salmon Run has its own stage rotation, switching out a couple of times a day on a schedule. You can check your pause menu in Splatsville to see when the changeover is coming, and what’s next. In addition to the stages, the weapons you’re randomly assigned during your shifts will also change on the same schedule.
At the time of writing, there are only three Salmon Run stages, but more are planned to release later. Those stages are:
- Sockeye Station
- Spawning Grounds
- Gone Fission Hydroplant
Rewards and Promotions

When you successfully finish a shift, your performance will be evaluated based on the number of Golden Eggs and Power Eggs you secured. Depending on how you did, you’ll receive points toward your Rank. If you just met the quota, you won’t get any change to your rank. If you go above and beyond and secure more Eggs than necessary, your rank will increase. If the shift fails or you miss your quota, your rank will go down.
As your rank rises, successful shifts will yield more GrizzCo Points. These points are awarded to you after every shift, and at certain milestones, can be redeemed for prizes at the front counter, next to Mr. Grizz’s radio. These rewards include things like Cash, gear, food and drink tickets, and more. Of course, as your rank rises, so too does the Hazard Level of your shifts. Having players with higher Hazard Levels in your team will make Salmonids more aggressive, cause Known Occurrences more frequently, and have higher Egg quotas. You wanna get paid more, you gotta work harder.
Related: How to Make Money Fast in Splatoon 3
Finally, attacking and defeating King Salmonids during the Xtrawave earns you Fish Scales. These Scales can be exchanged at the counter for rewards like locker and Splashtag cosmetics, as well as differently-colored gear for your shifts. You’ll only earn Bronze Scales at first, but as you rise in rank, you’ll start earning Silver and Gold Scales as well, which can be redeemed for cooler stuff.
Salmon Run has an entirely separate meta from Turf Wars and Anarchy Battles. If you’re a little burnt out on inking turf, why not try your hands at an exceptionally dangerous part-time job? Come on, it’ll build character.


Published: Sep 13, 2022 01:17 pm